Pulley Balancing
11/01/14 12:52 Filed in: All
In an earlier post I showed how I lathed off most of the lugs for the fan blades on the main transmission pulley. I mentioned this to Blake at Reno and he indicated that I should rebalance the pulley more carefully than I had. The lugs are not uniform and the weight removed is not perfectly symmetric.
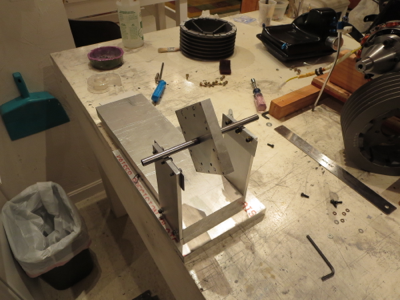
So I built a balancing jig. It's sized for the main transmission pulley and pretty basic. Some heavy stock for the sides and base and two sections of stainless steel ruler (Harbor Freight $1 items) for the "knife edges" sanded and polished on the edges.
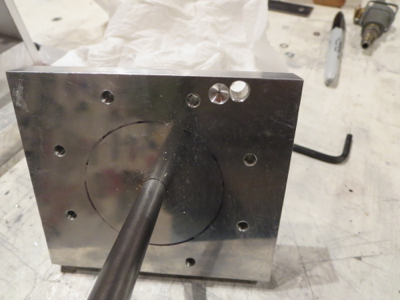
The carrier is an "almost" square block. I measured and drilled the bolt holes for the pulley flat face as precisely as I could (again, the mill with DROs is a godsend). All holes are +/- 0.002" of their ideal position. The center spindle is a piece of 4130 steel tubing. I drilled the center hole slightly undersized and sanded up to a super snug press fit. Once pressed in the tubes were sanded and polished.
Next, the carrier assembly itself has to be balanced as perfectly as possible and the jig leveled. The through hole and the partially drilled hole achieved that balance. There were already some partially drilled holes on the other side of this block, and the drilling ops are not perfect, no matter how carefulIy it was machined. This is a very important step. When the carrier spindle is balanced you can level the jig with shims to be perfectly level. Even the tiniest of differences causes the balanced item to roll off one side or the other. It's pretty impressive how delicate/accurate this thing is.
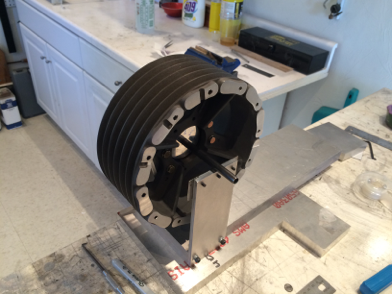
Only THEN can you start balancing the pulley. Bolt it together, see which side is down, mark it, redo the measurement with the carrier at 4 90 degree points, then draw lines across the face of the pulley. The center intersection point is the center of gravity. Since the carrier is not perfectly centering, you must do four measurements at the cardinal points and then draw the centroid. Only THEN remove material on the heavy side - a little at a time - then repeat.
It took several hours, but I am quite satisfied that the balance is WAY better than anything achieved taking the pulley right out of the box, especially if you bolted those hand-cut cooling fins on. I am pretty sure it is now within a gram or two of perfect balance.
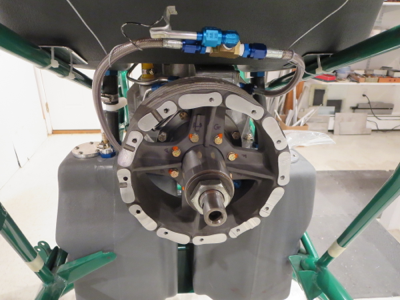
Bolted, torqued, and torque sealed in the ship for the last time! Another "final assembly" thing down. On to the engine!


