
Cabin Interior painting
10/19/15 00:16 Filed in: All
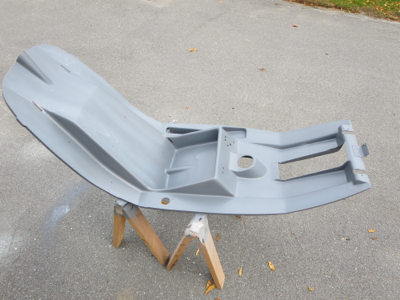
I had, at one point, considered lining the cabin interior with a fabric, but quickly dismissed it as weighty and labor intensive for limited gain in looks. To keep it simple and light, I lightly sanded it to remove the high-stranding fiberglass artifacts, then primed with the epoxy grey. I did not bother to fill the weave, or anything like that.
I wanted a finish that was light colored, but not reflective. The ideal solution was a stone finish spray paint. This is very similar to "spatter paint" that used to be popular as trunk paint for automobiles. I used Rustoleum "Simply Stone" granite finish. To me it looks nothing like granite, but for this application it looks pretty good.
The best part is that it really masks the open weave of the rough interior of the fiberglass. I highly recommend this stuff as simple and easy for this application.
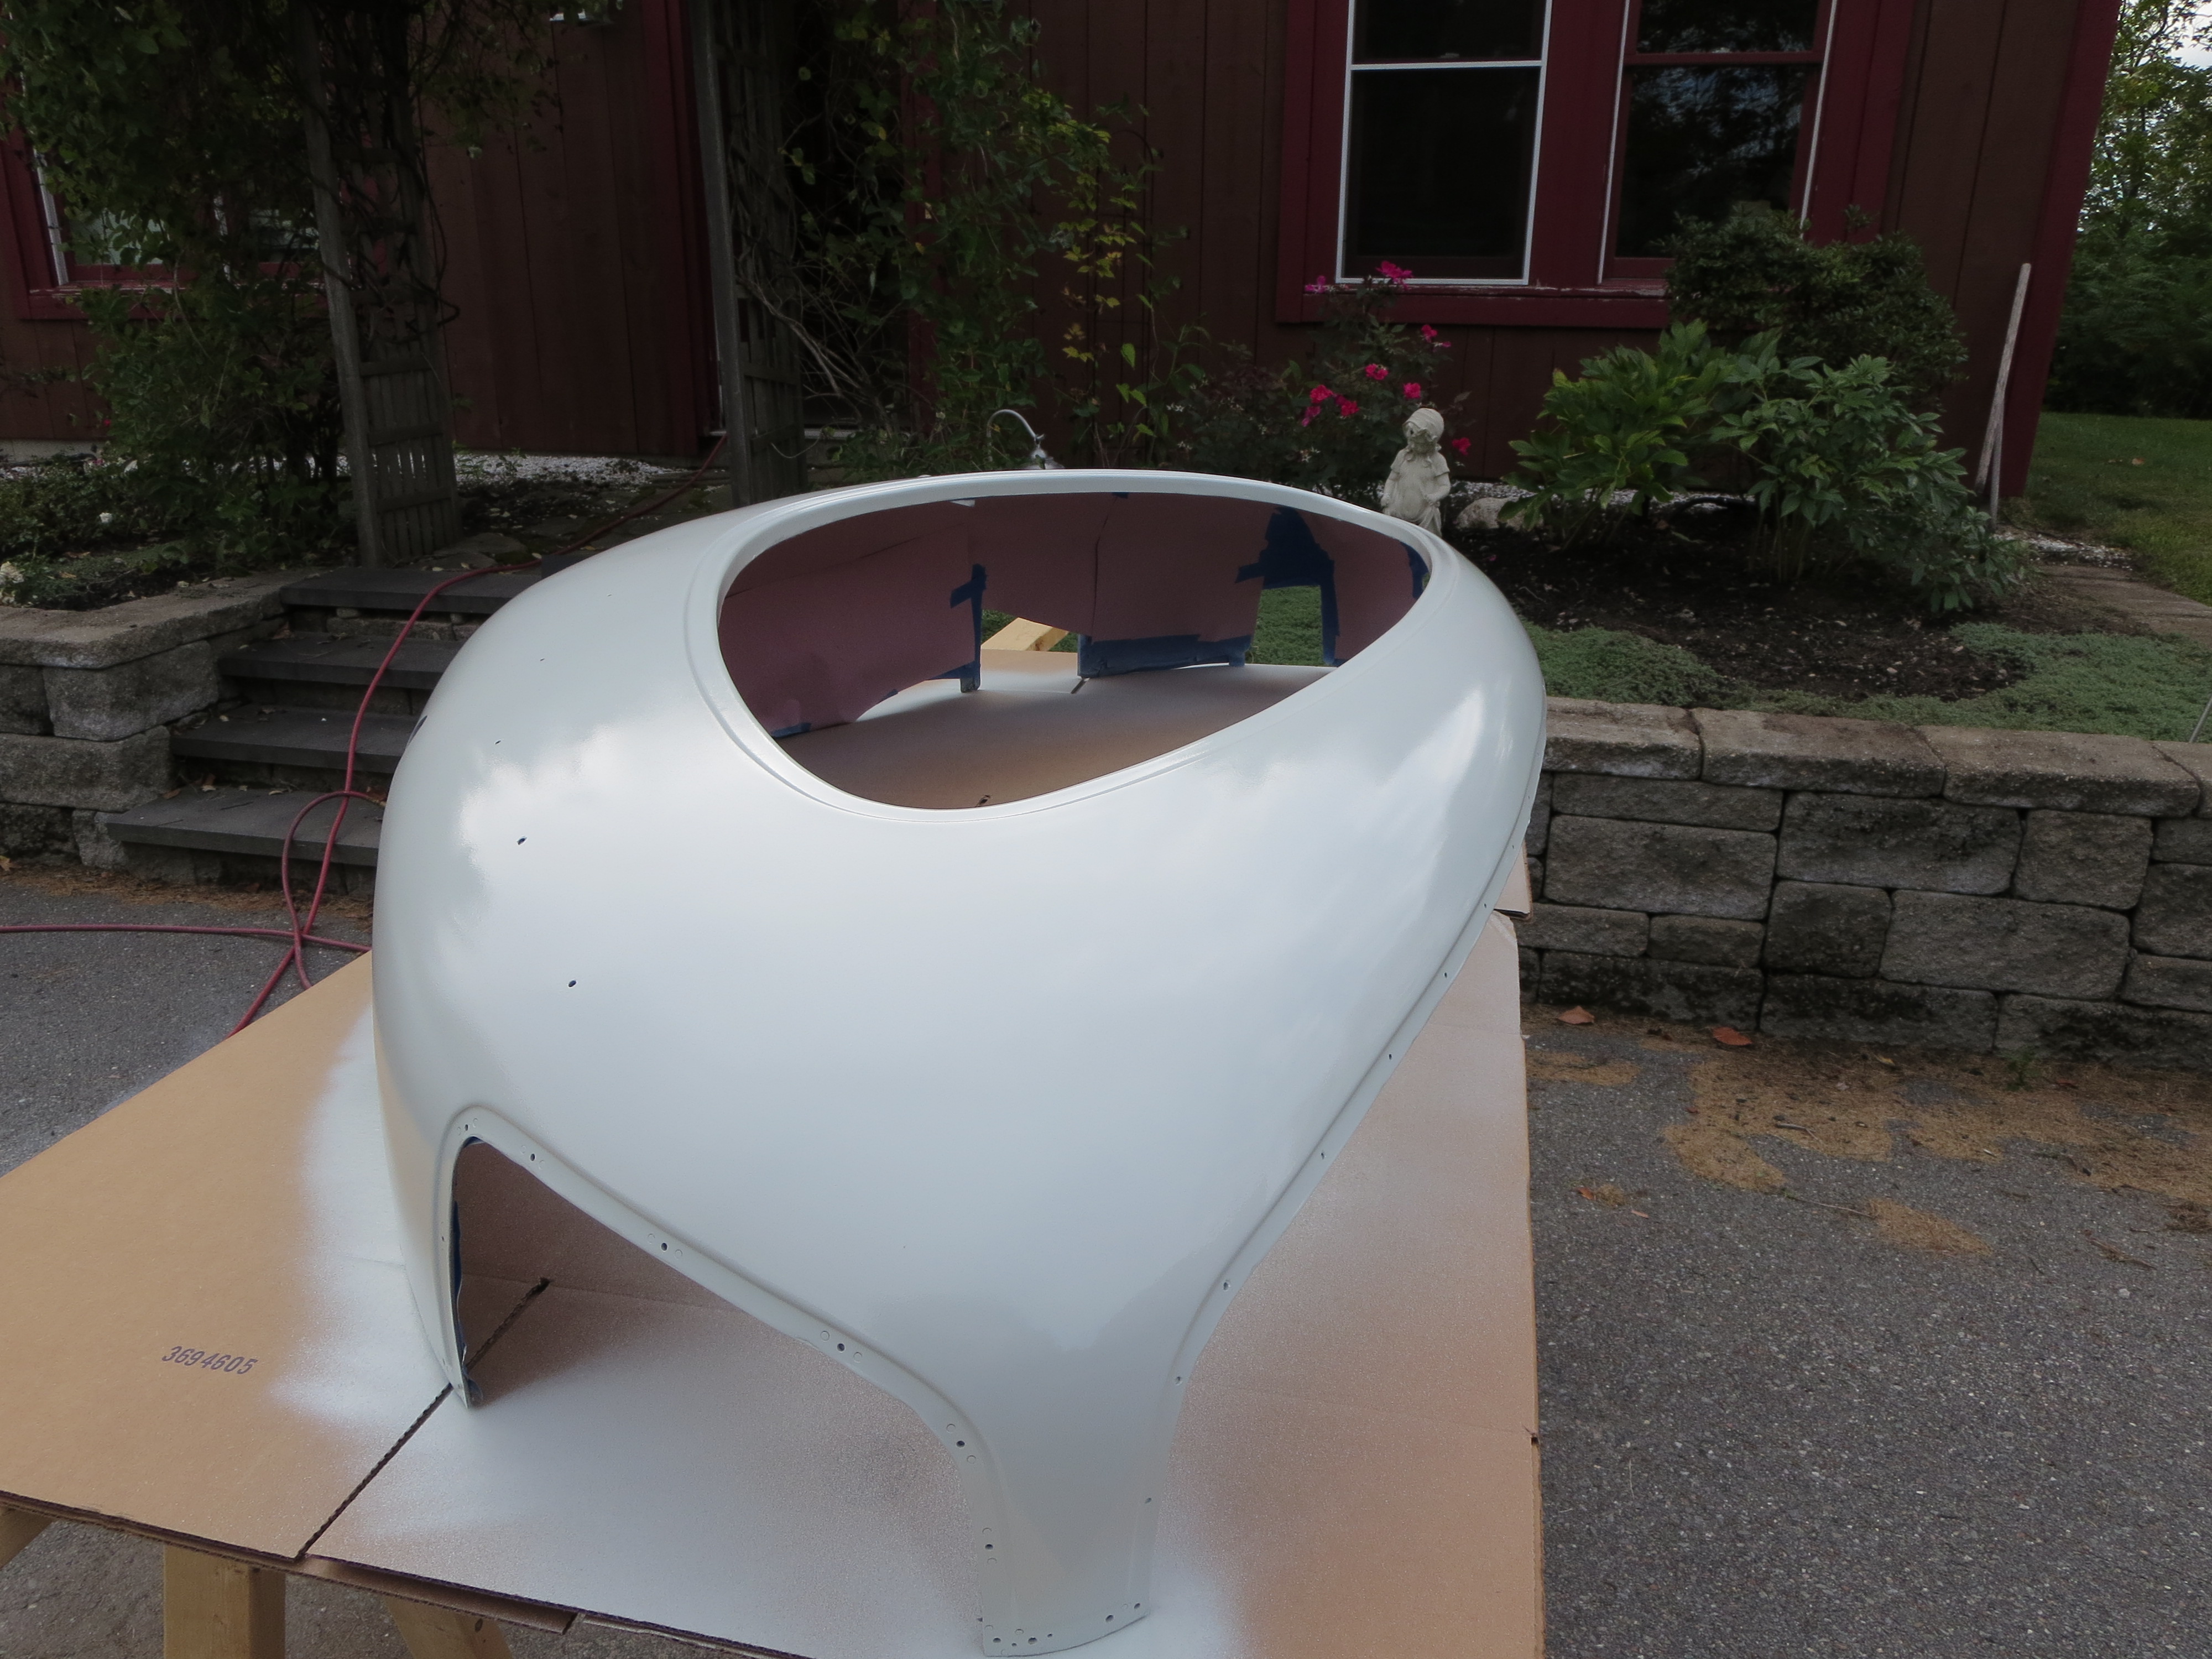
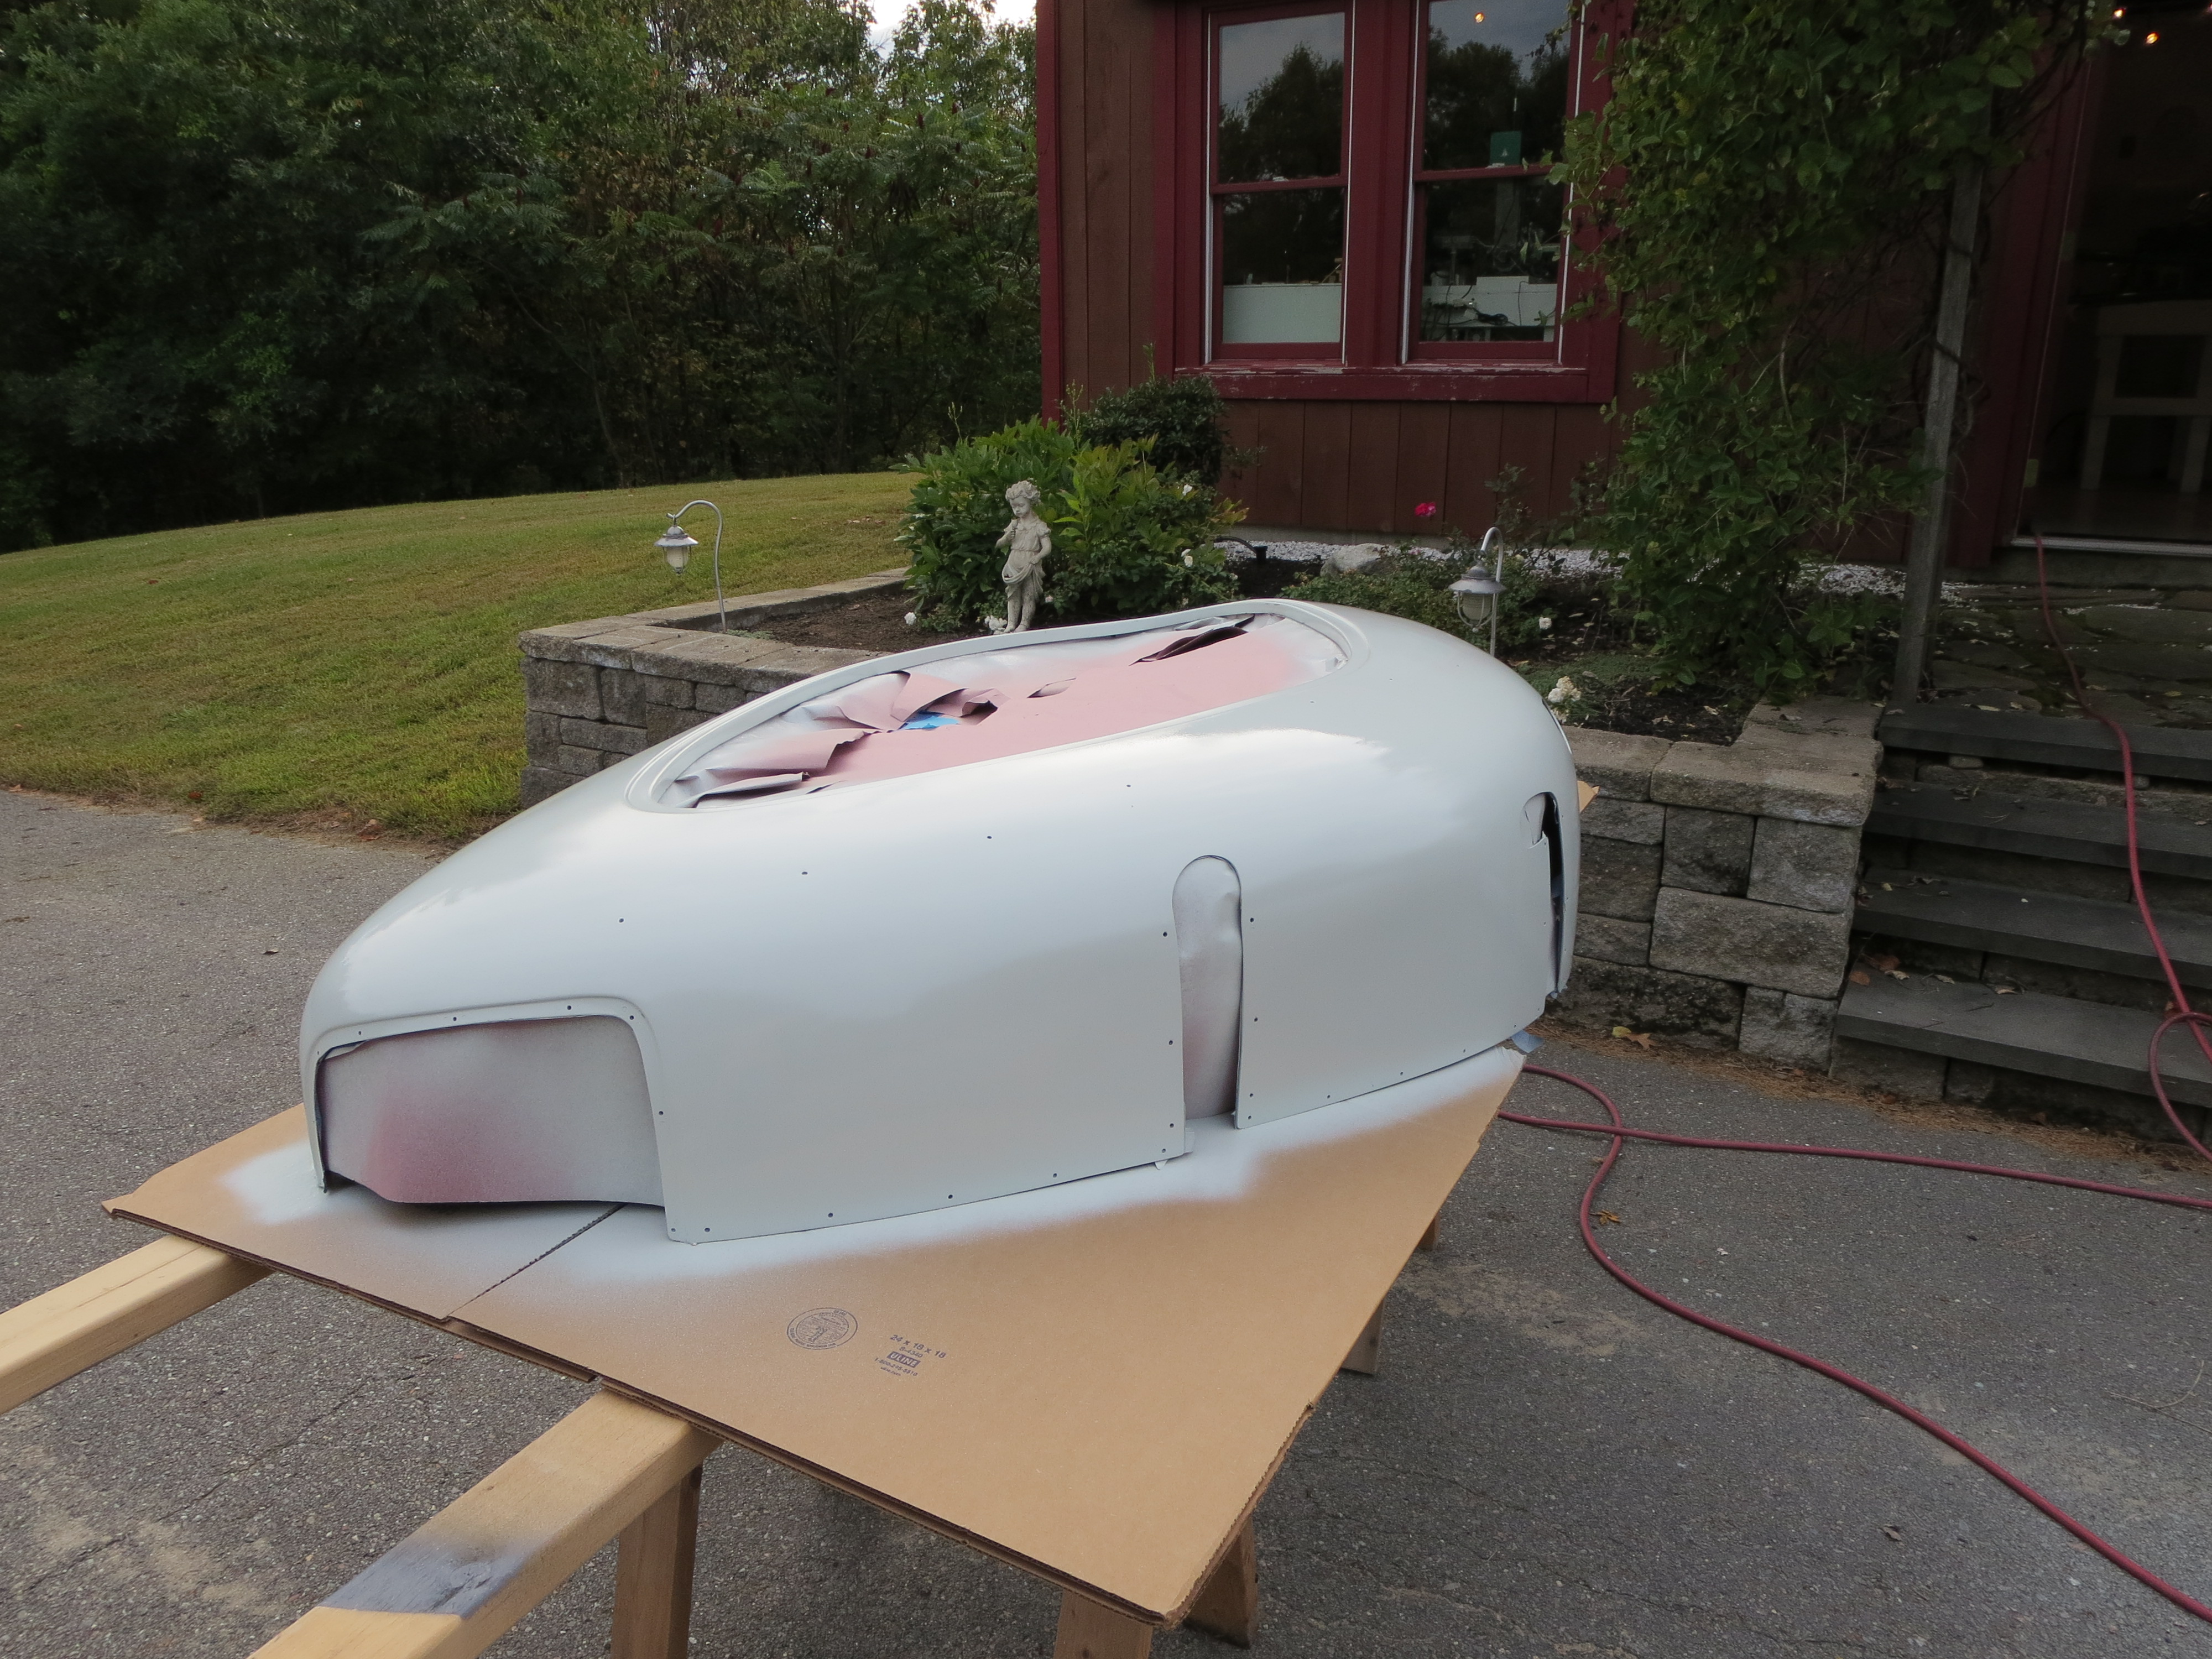
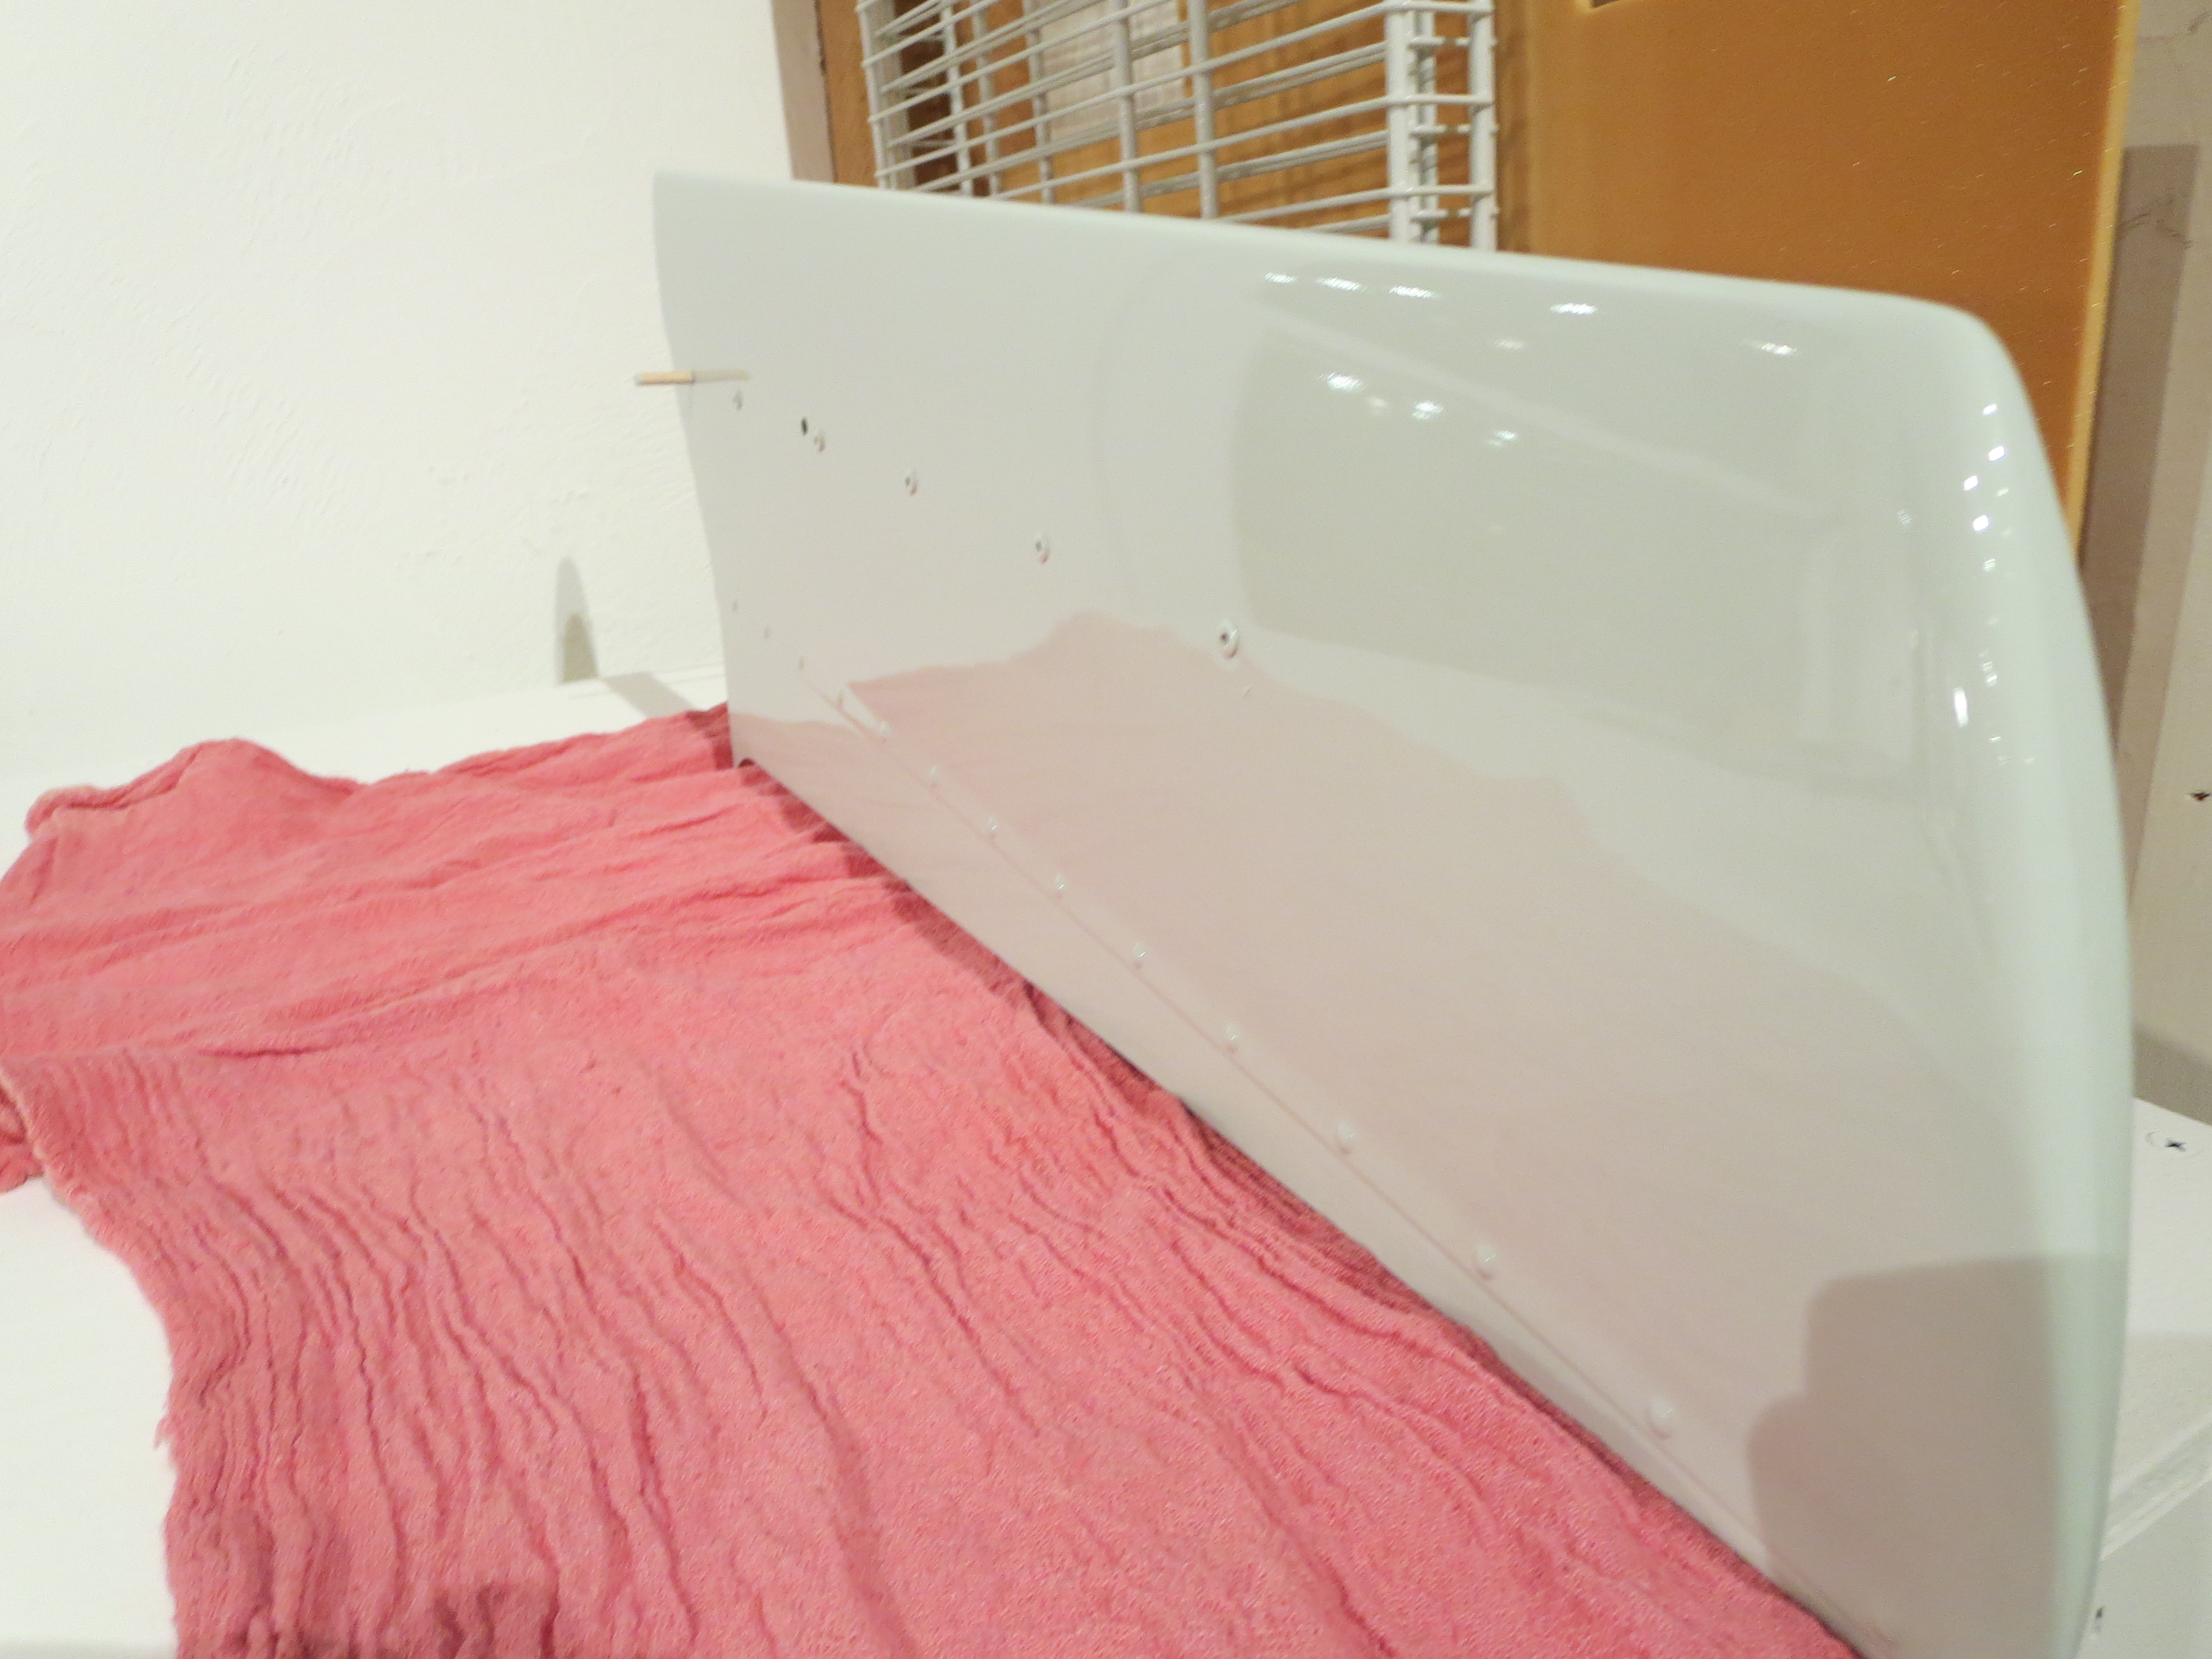
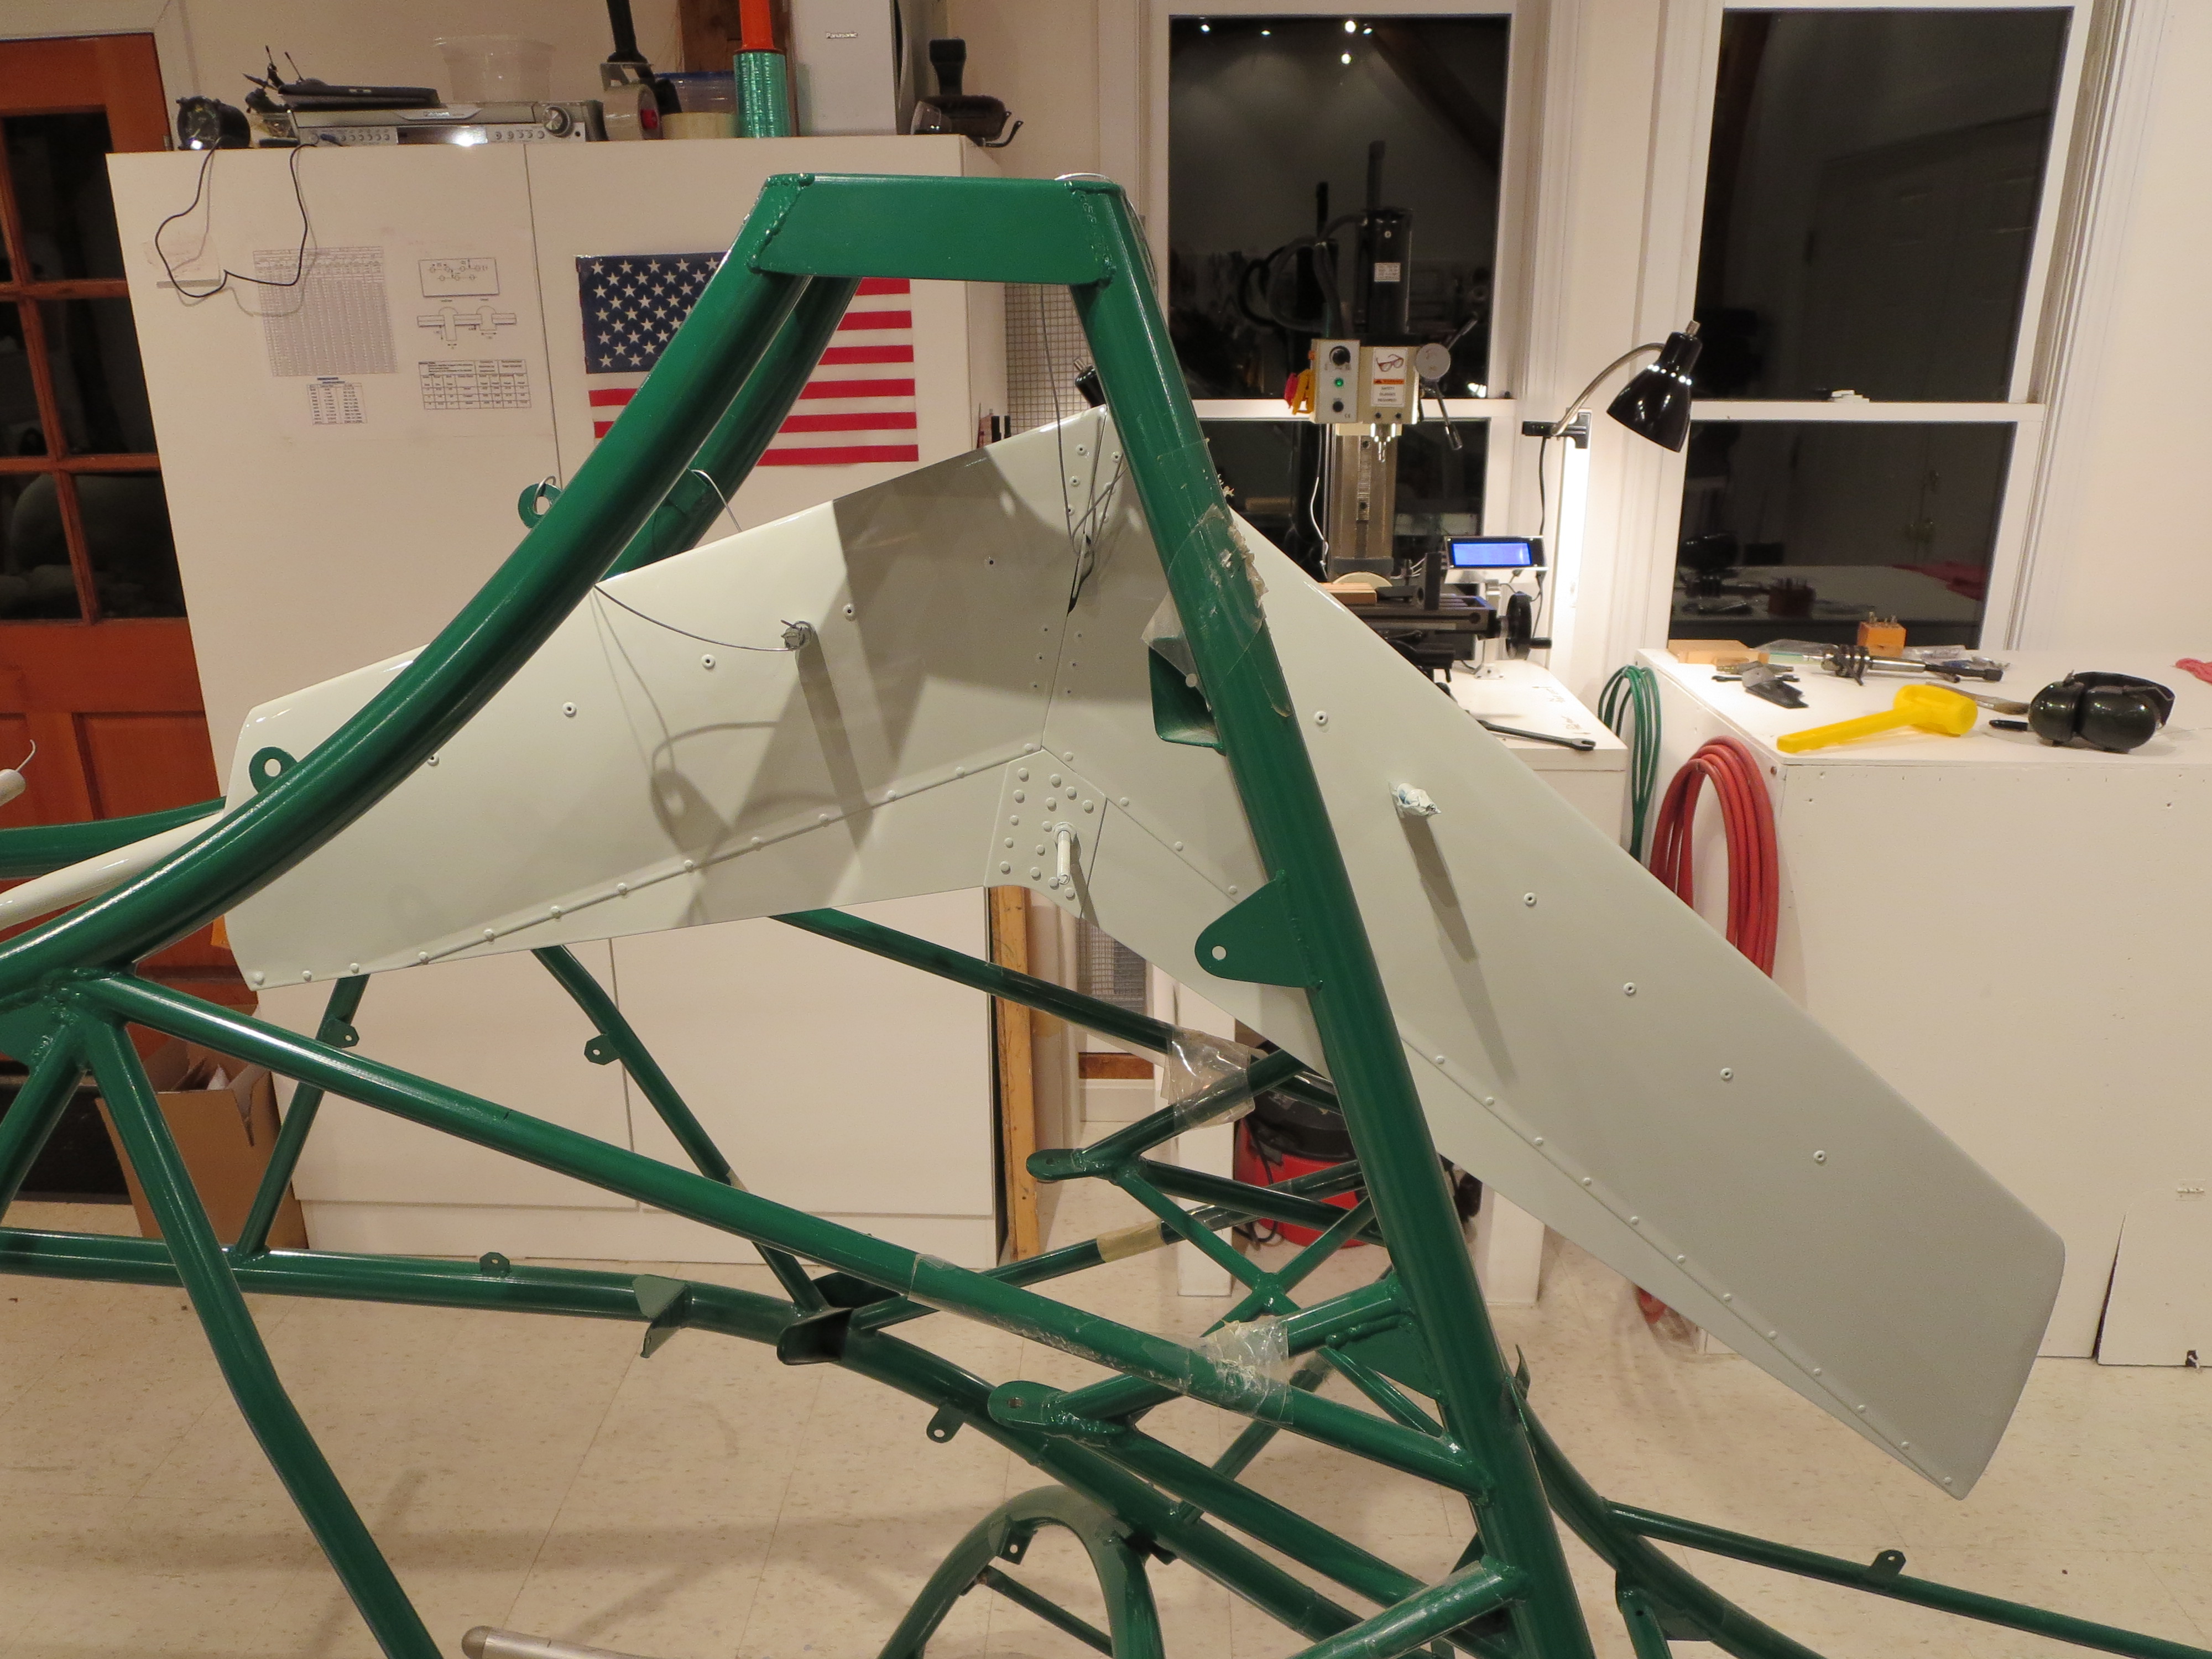
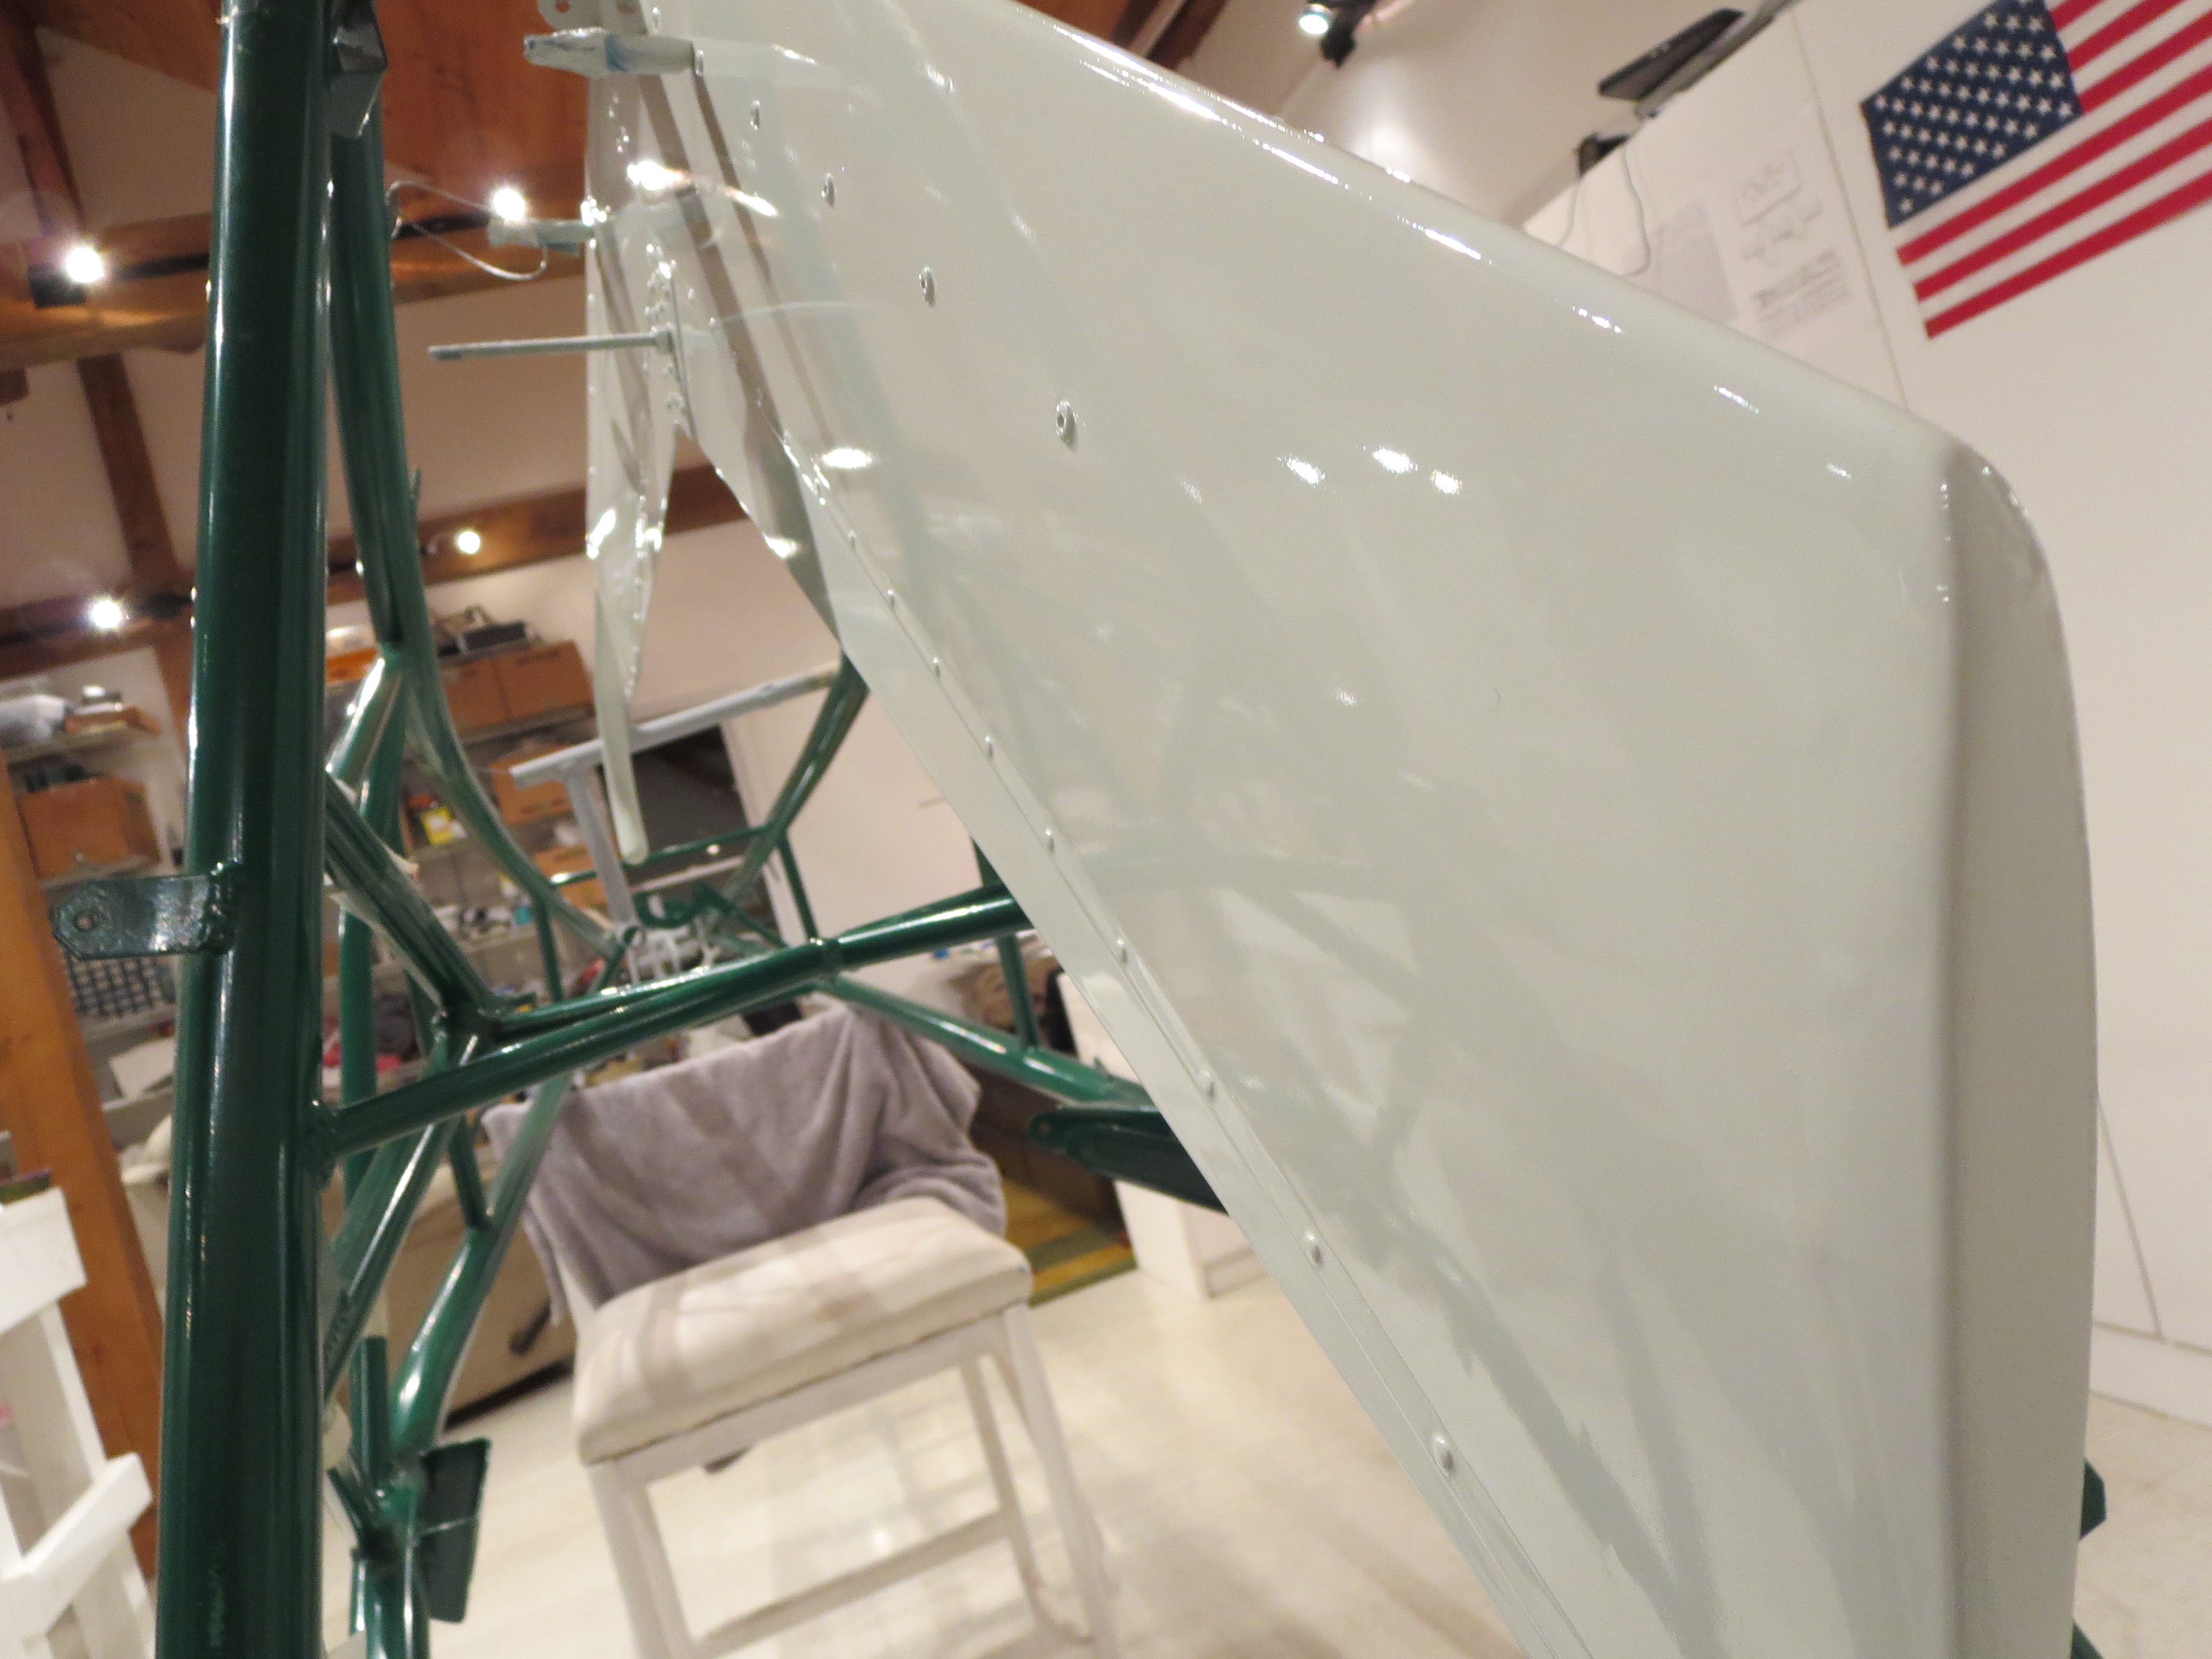
Cabin Exterior Painting
10/11/15 23:14 Filed in: All
And thus begins the sad story of my cabin painting…
I have primed a bunch of stuff with only one real problem (see my SP priming entry), then I painted my fins and seat pan. The fins came out super-nice as did the seat pan. I was feeling like there were a bunch of pansies out there on the web, saying that painting was so hard and such an art form. If you read some folks descriptions it sounds like some god-like skills are needed. All of my things came out well enough that I was thinking there was not much to it. How wrong I was.
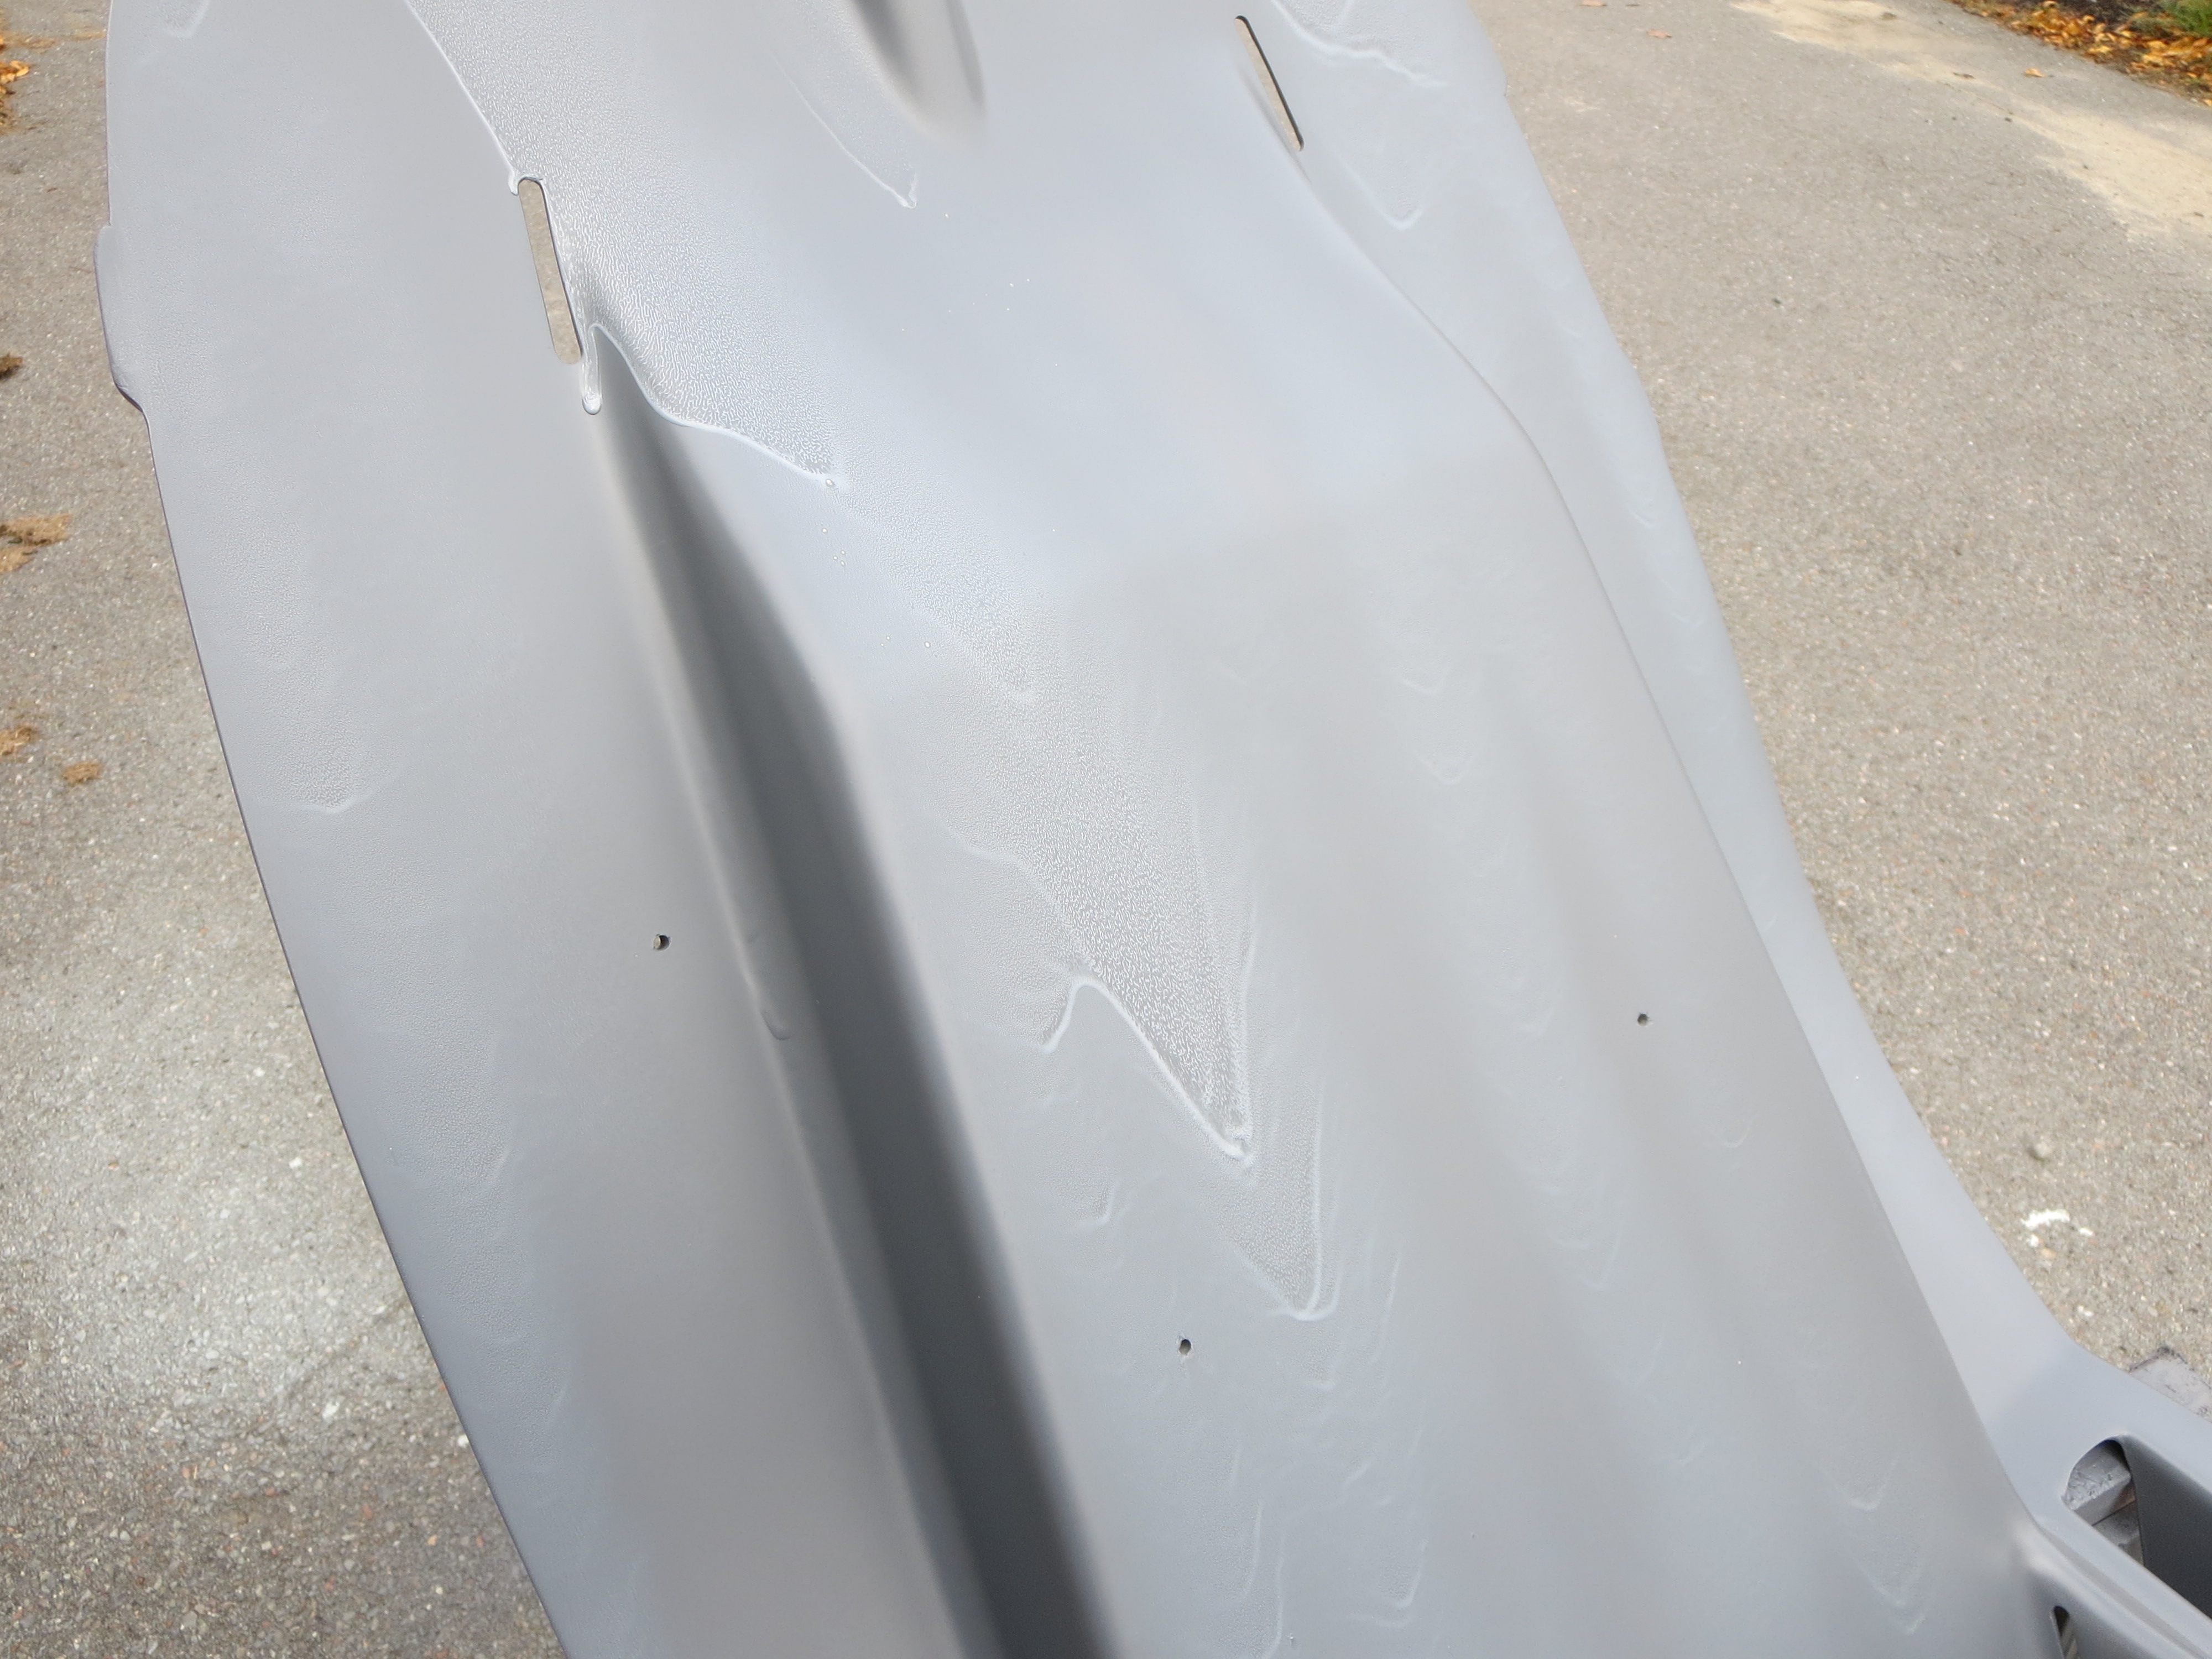
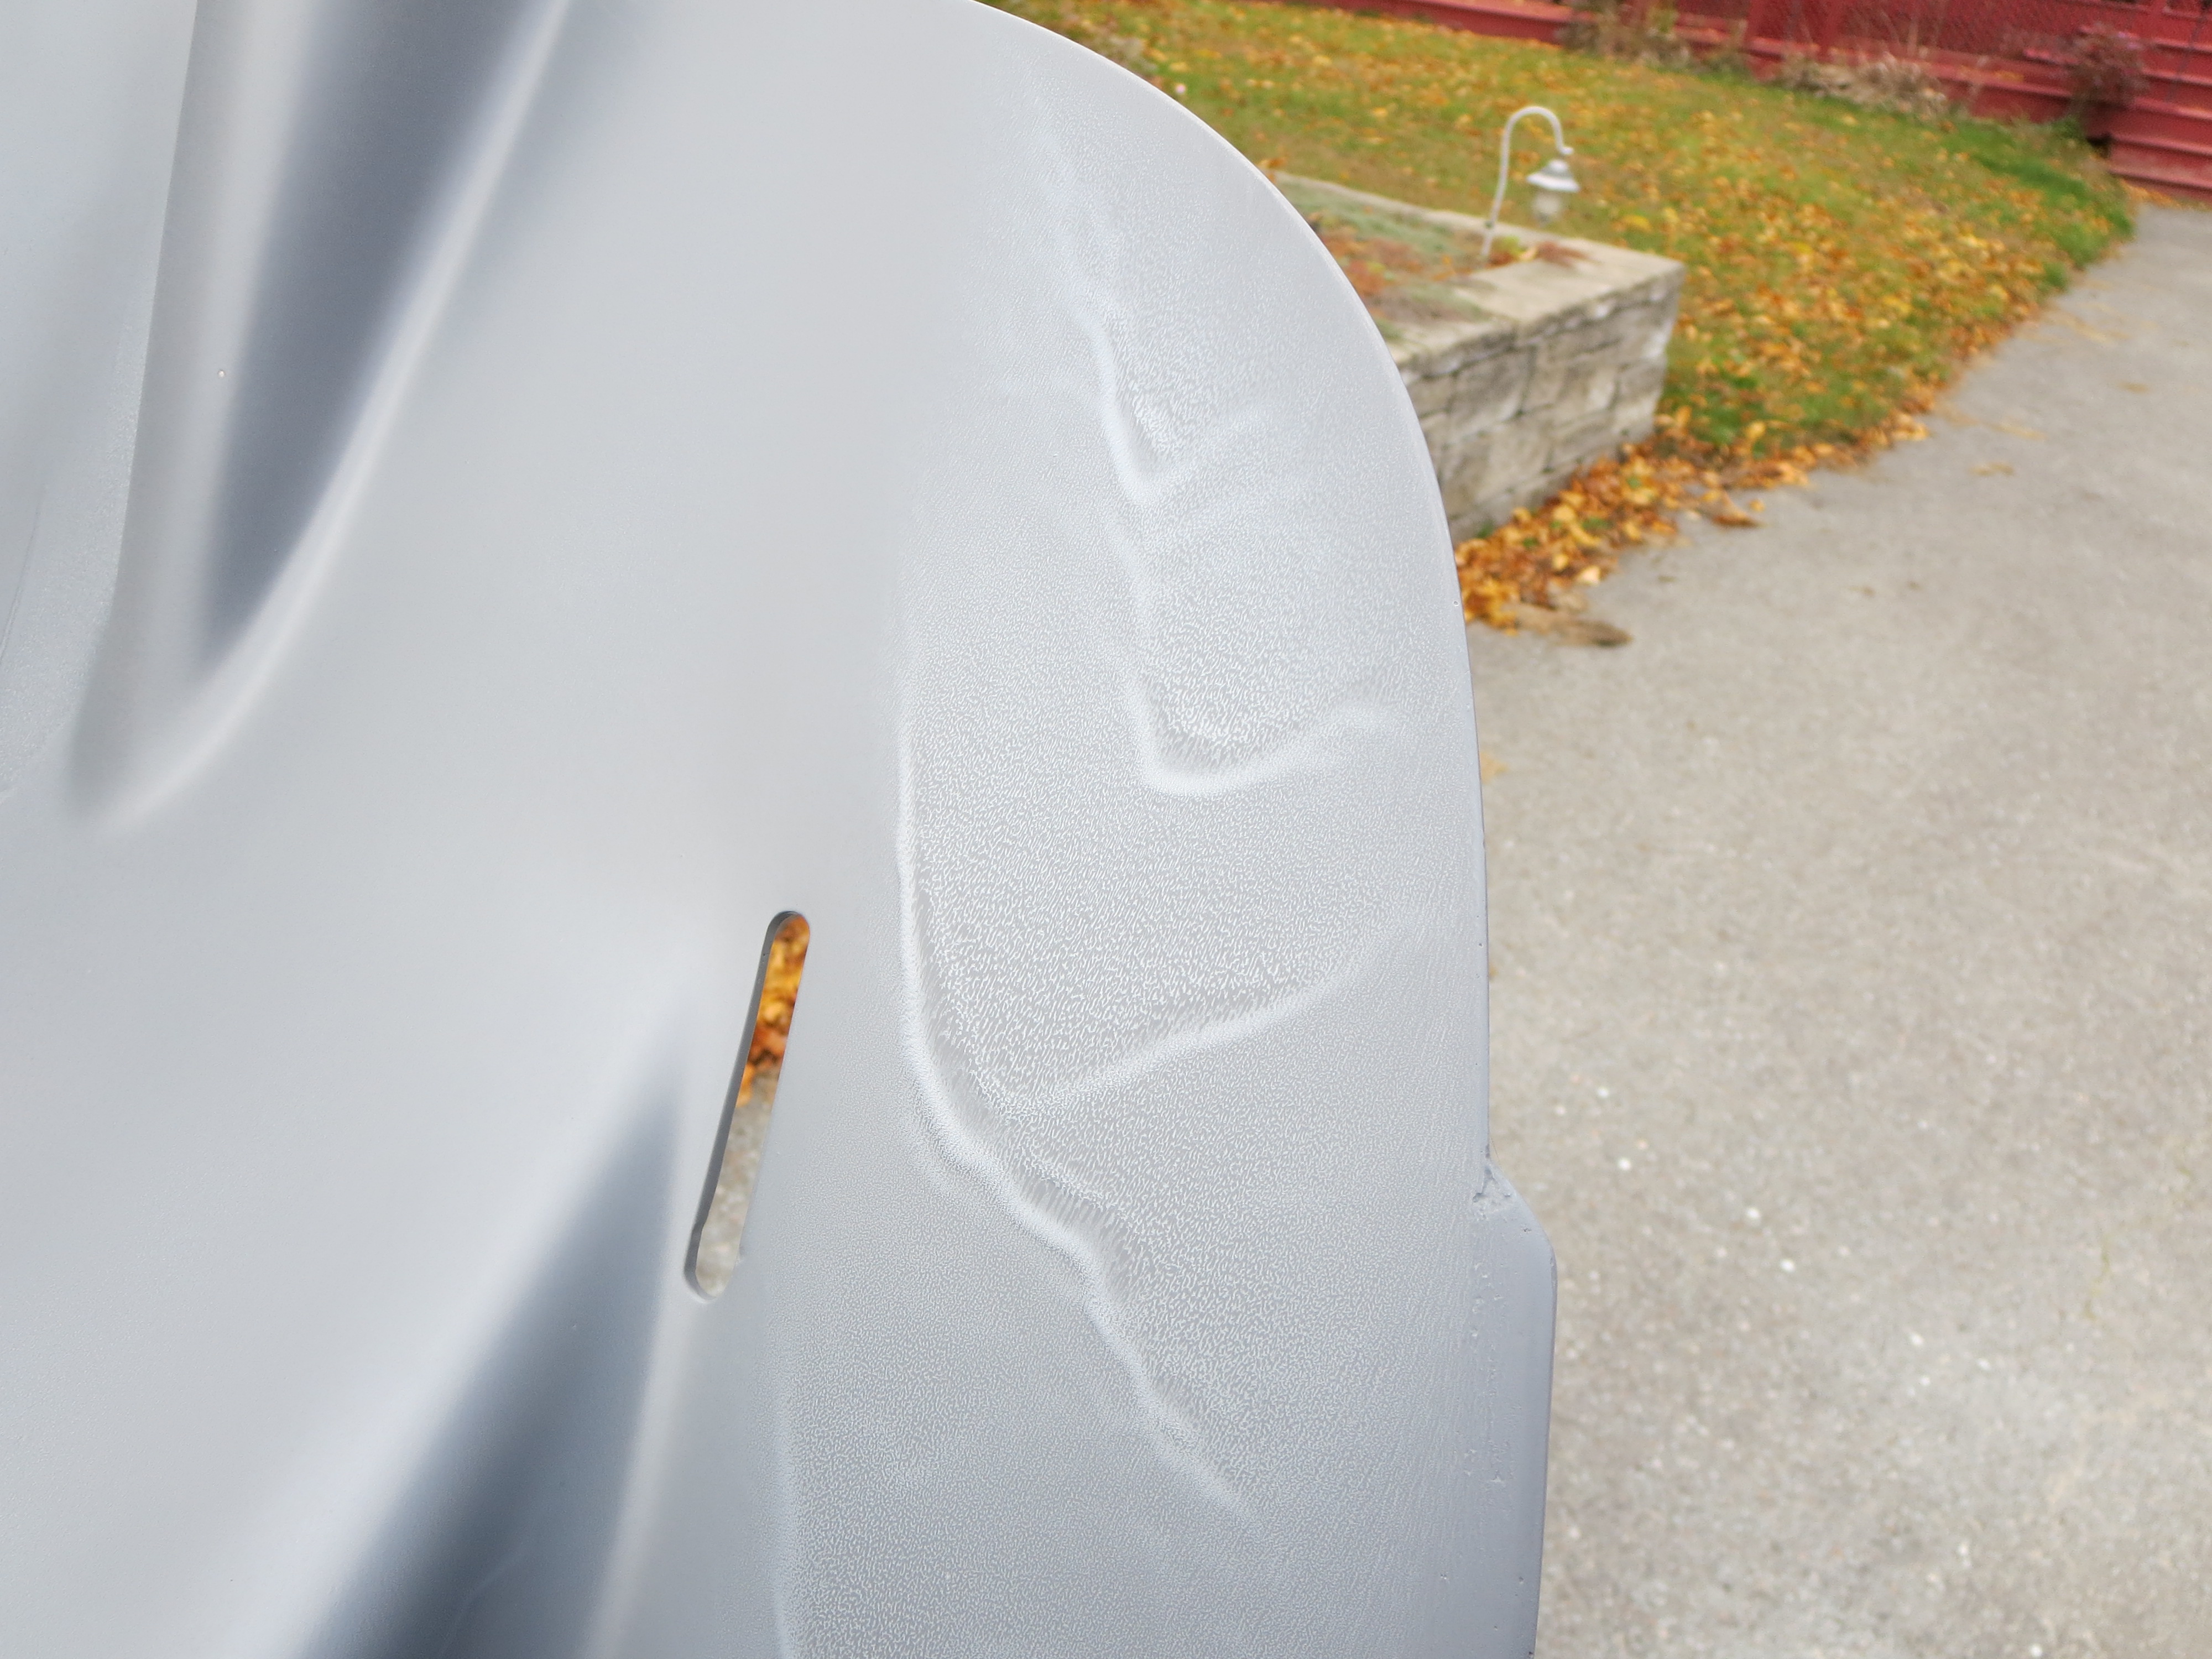
To make it easy for myself I had chosen a single-stage 2-part polyurethane paint for the cabin. The color is plain white, just to avoid any of the shading issues I read so much about.
When I painted the fins I was impressed with how nicely the urethane paint "flowed-out", and leveled itself, creating a glass smooth surface. So I jumped in to the cabin exterior using the skills and techniques I thought were developed at this point. The surfaces were primed, wet-sanded, masked and cleaned well. No problems. I used the same gun that I used for the fins.
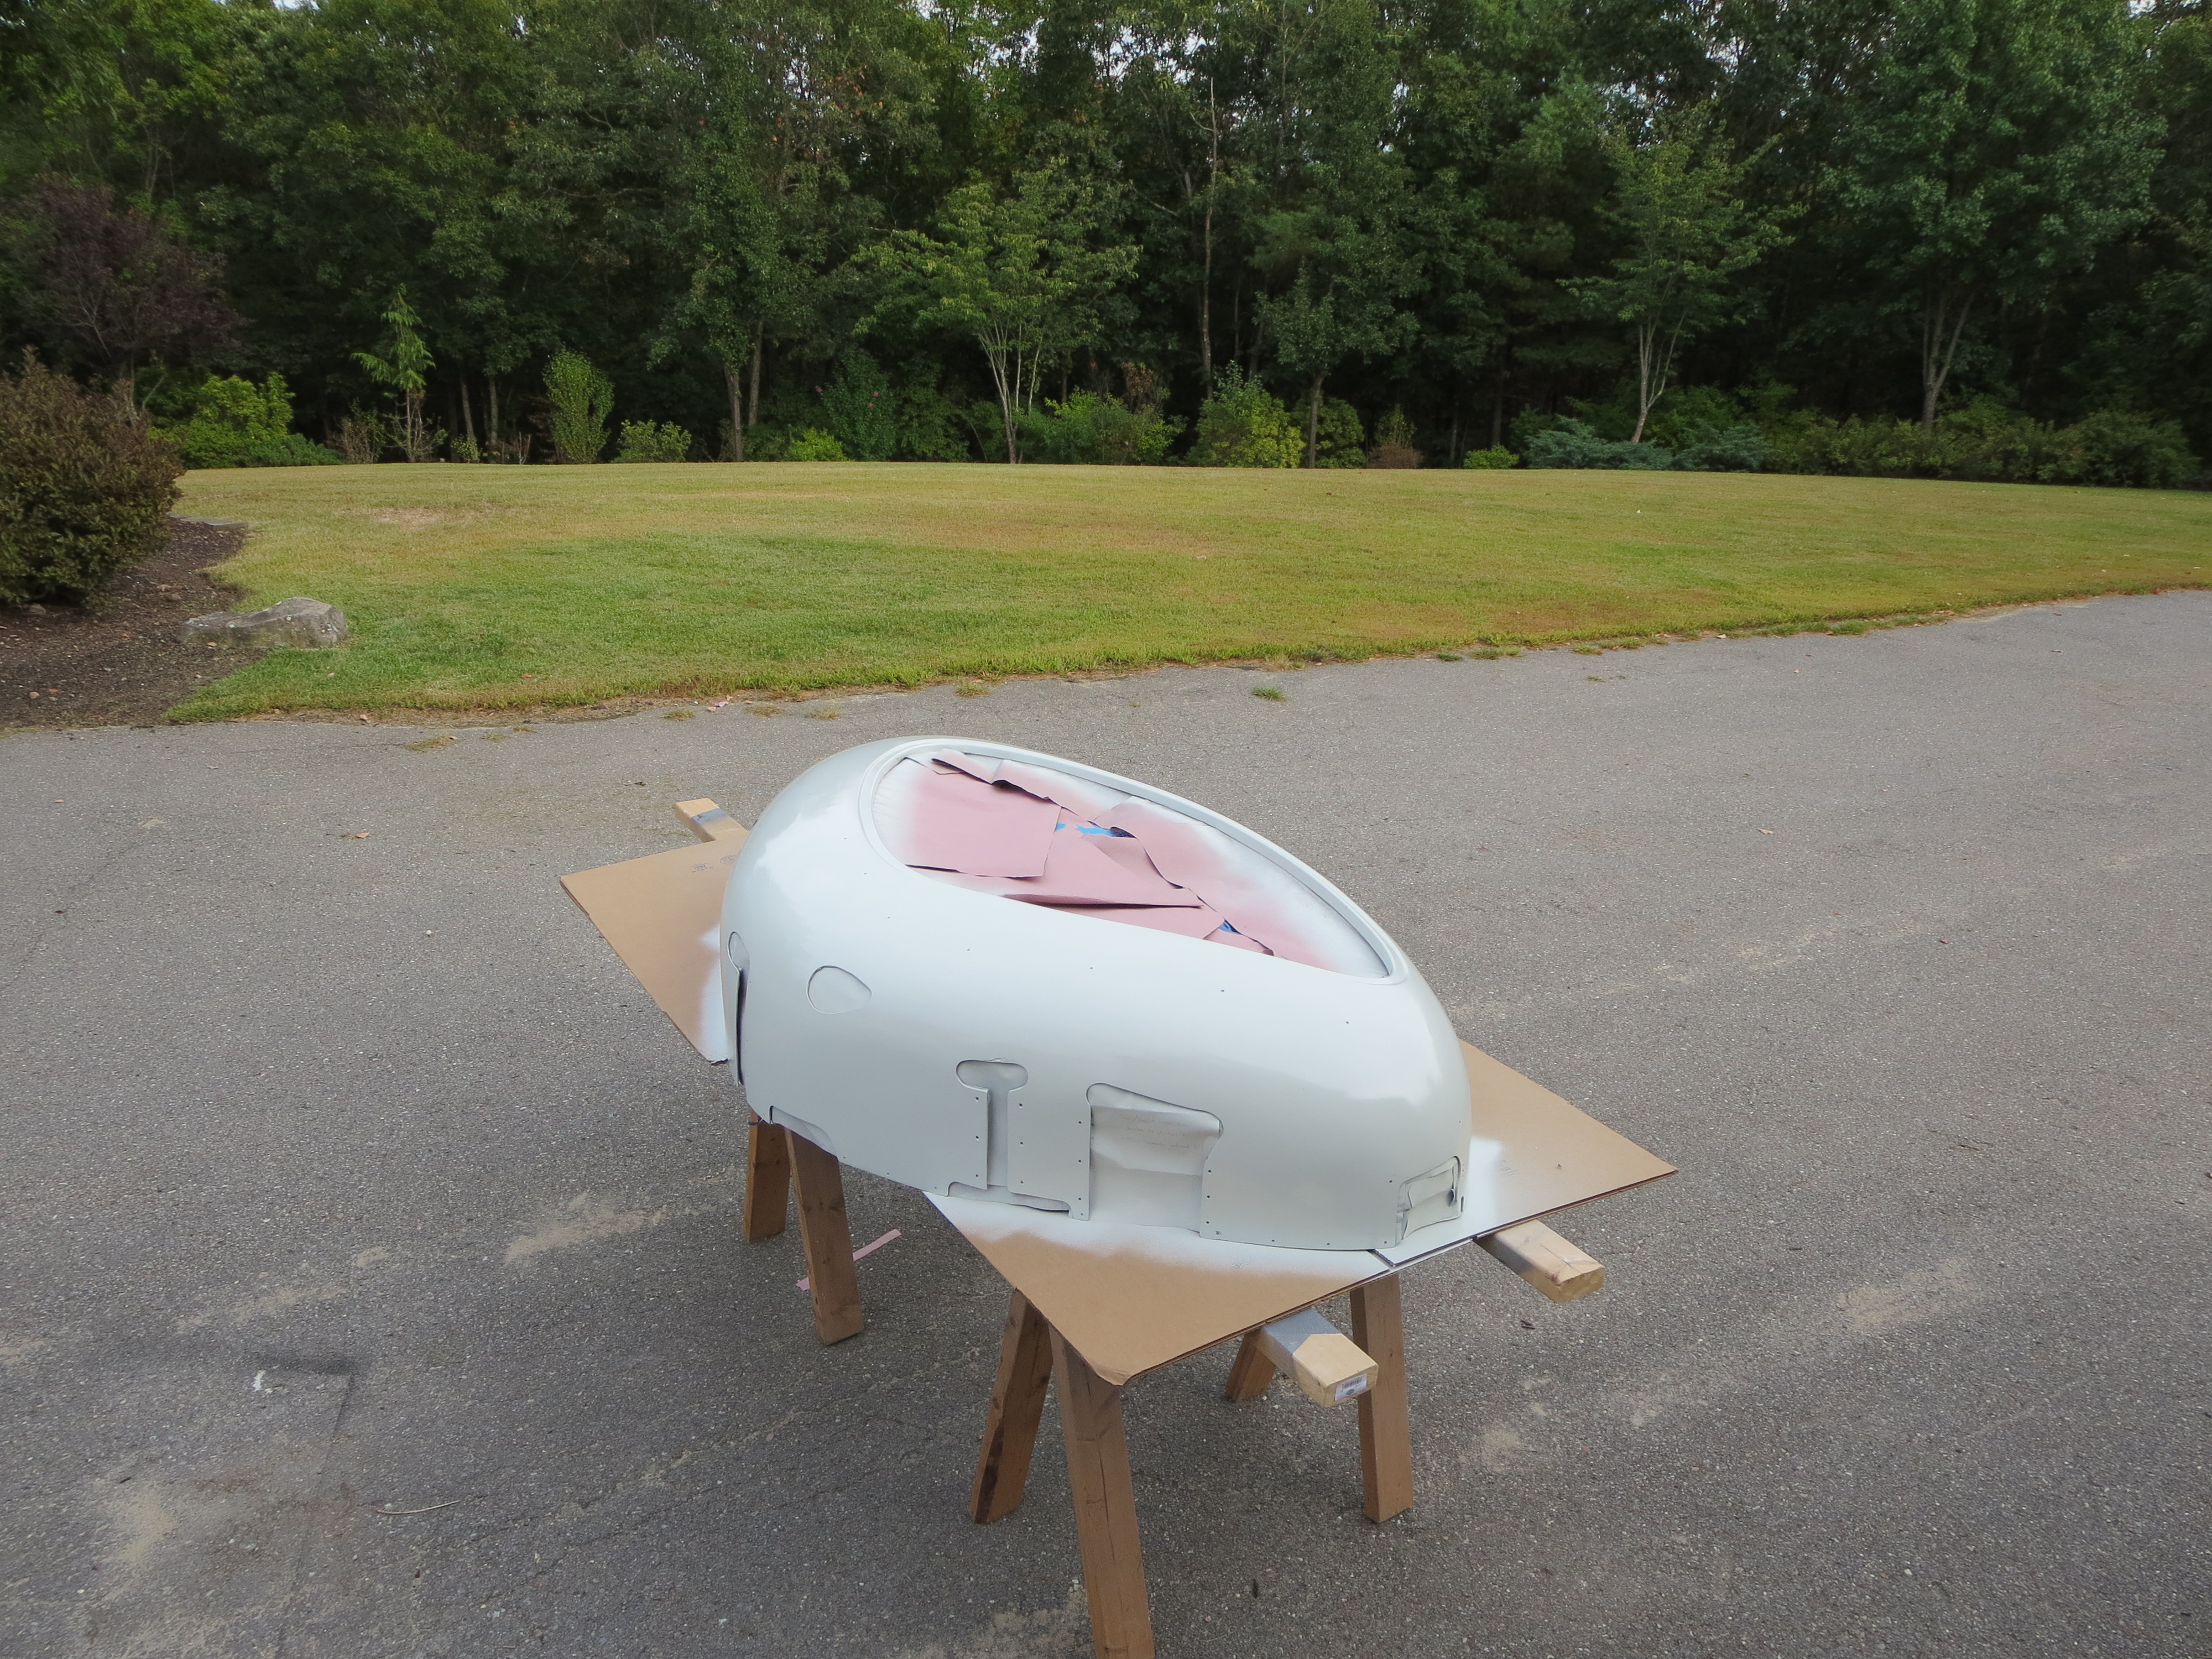
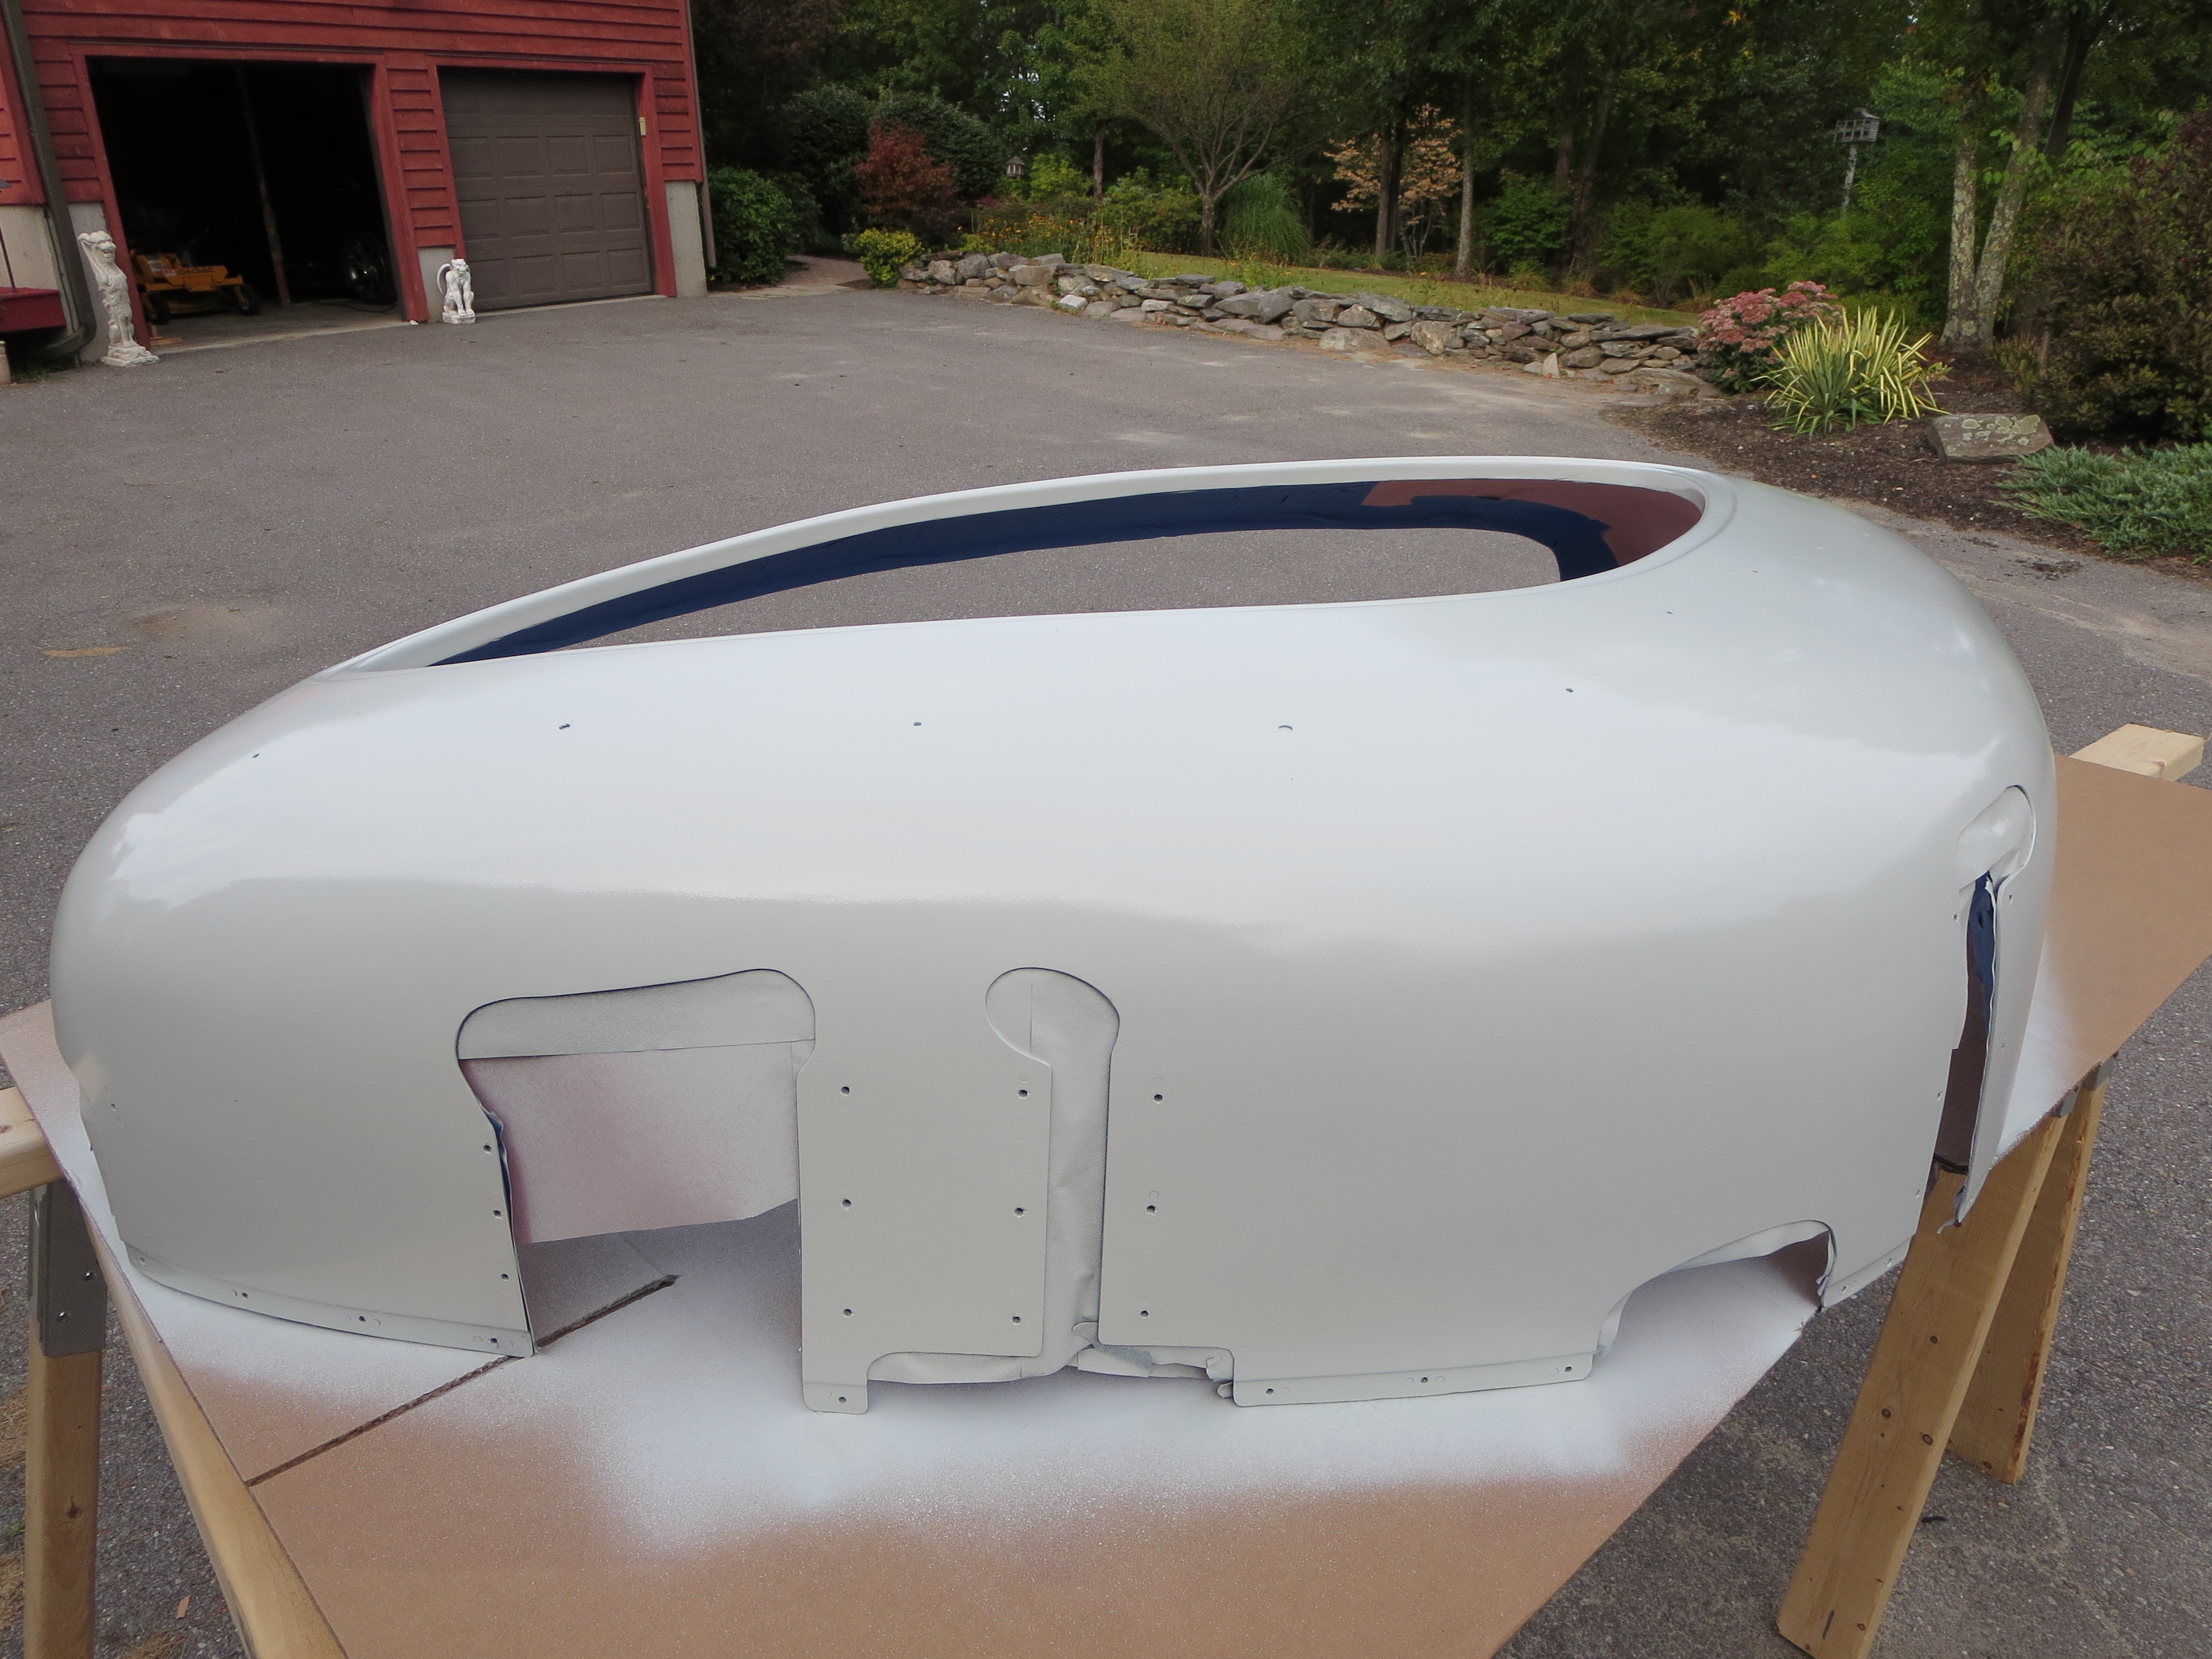
The first coat went on fairly light. It was mid-morning and the temps were in the 70's and the humidity was relatively low outside. There wasn't as much "flow-out" on the first coat as I would have liked, but it was a light first coat. I expected the second coat to flow out better.

Between coats there must have been something in the gun that I had missed during the previous cleaning that broke off and clogged one of the output holes on the nozzle. No problem, I had another of the exact same gun in the shop. I would just swap the paint, set the new gun exactly as I had the first and carry on. This was my mistake. I made a couple of test swipes on my practice piece that is always outside when I am painting. It was a little grainy, but basically OK - or so I thought. I figured it would flow out in a minute or two.
Coupled with that was the fact that is was later in the day, the sun was now out brightly, and the humidity was even lower than before. After I laid down the next coat (on both cabin half exteriors) I noticed that it was not flowing out as I had experienced in the past. OK. Not good. I increased the flow a tad to try to increase the quantity So it would flow better and "fill-in" the grain. What I learned later was that I should have lowered the pressure as what I was experiencing was dry-spray, not a flow problem. Too much air was effectively drying the paint on the way out of the gun causing a graininess. Nuts. Even though my second gun looked exactly the same and was the same model, the second gun was a newer gun and was very different internally (I learned later).
Decision time; Stop or continue? In that few seconds I decided to lay down as much paint as I had and sand it smooth later. It was either that, or stop, let it dry, sand it all off, reprime, and re-paint. Other factors at work were the fact that this was probably one of the last days I was going to get with a good temperature and warm enough outdoors to paint.
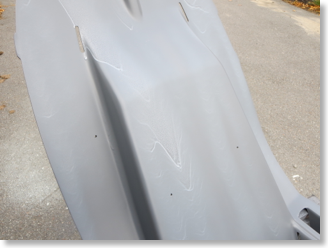
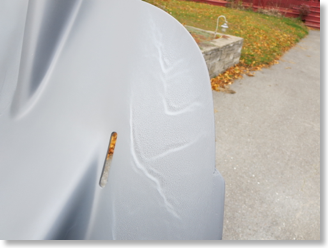
So there I was - I had two cabin halves with the surface texture of table salt. It really looked bad. Time to start sanding. I hoped that I had laid down enough paint so that I would not thin it too much.

The next two weeks of evenings were spent with a spray bottle of water, sandpaper and dual-action orbital polisher. Start with 500 grit (yes 500 grit for real), wet sand, then work to 800, 1000, 1200, 1500, and then 2000. Follow that with a multiple passes of the polisher with an aggressive cutting compound. Wipe it all off, look at it with a bright light and repeat, starting with the coarse grit on up. Repeat. Repeat. Repeat.
I learned an awful lot about how paint behaves. First or all, it is very possible to work with paint. If it was just some light orange peel, I am confident that I could have smoothed it out nicely, with labor, of course, but not too bad. The problem with my situation was depth. If you think of the surface in profile as a jagged series of little sawtooth mountains, it is easy to sand off the "peaks". However, once you have created "plateaus", you have a much larger surface area, the ever growing plateaus, to sand to work in to the "valleys". Initial progress is fast and noticeable, then it slows way down.
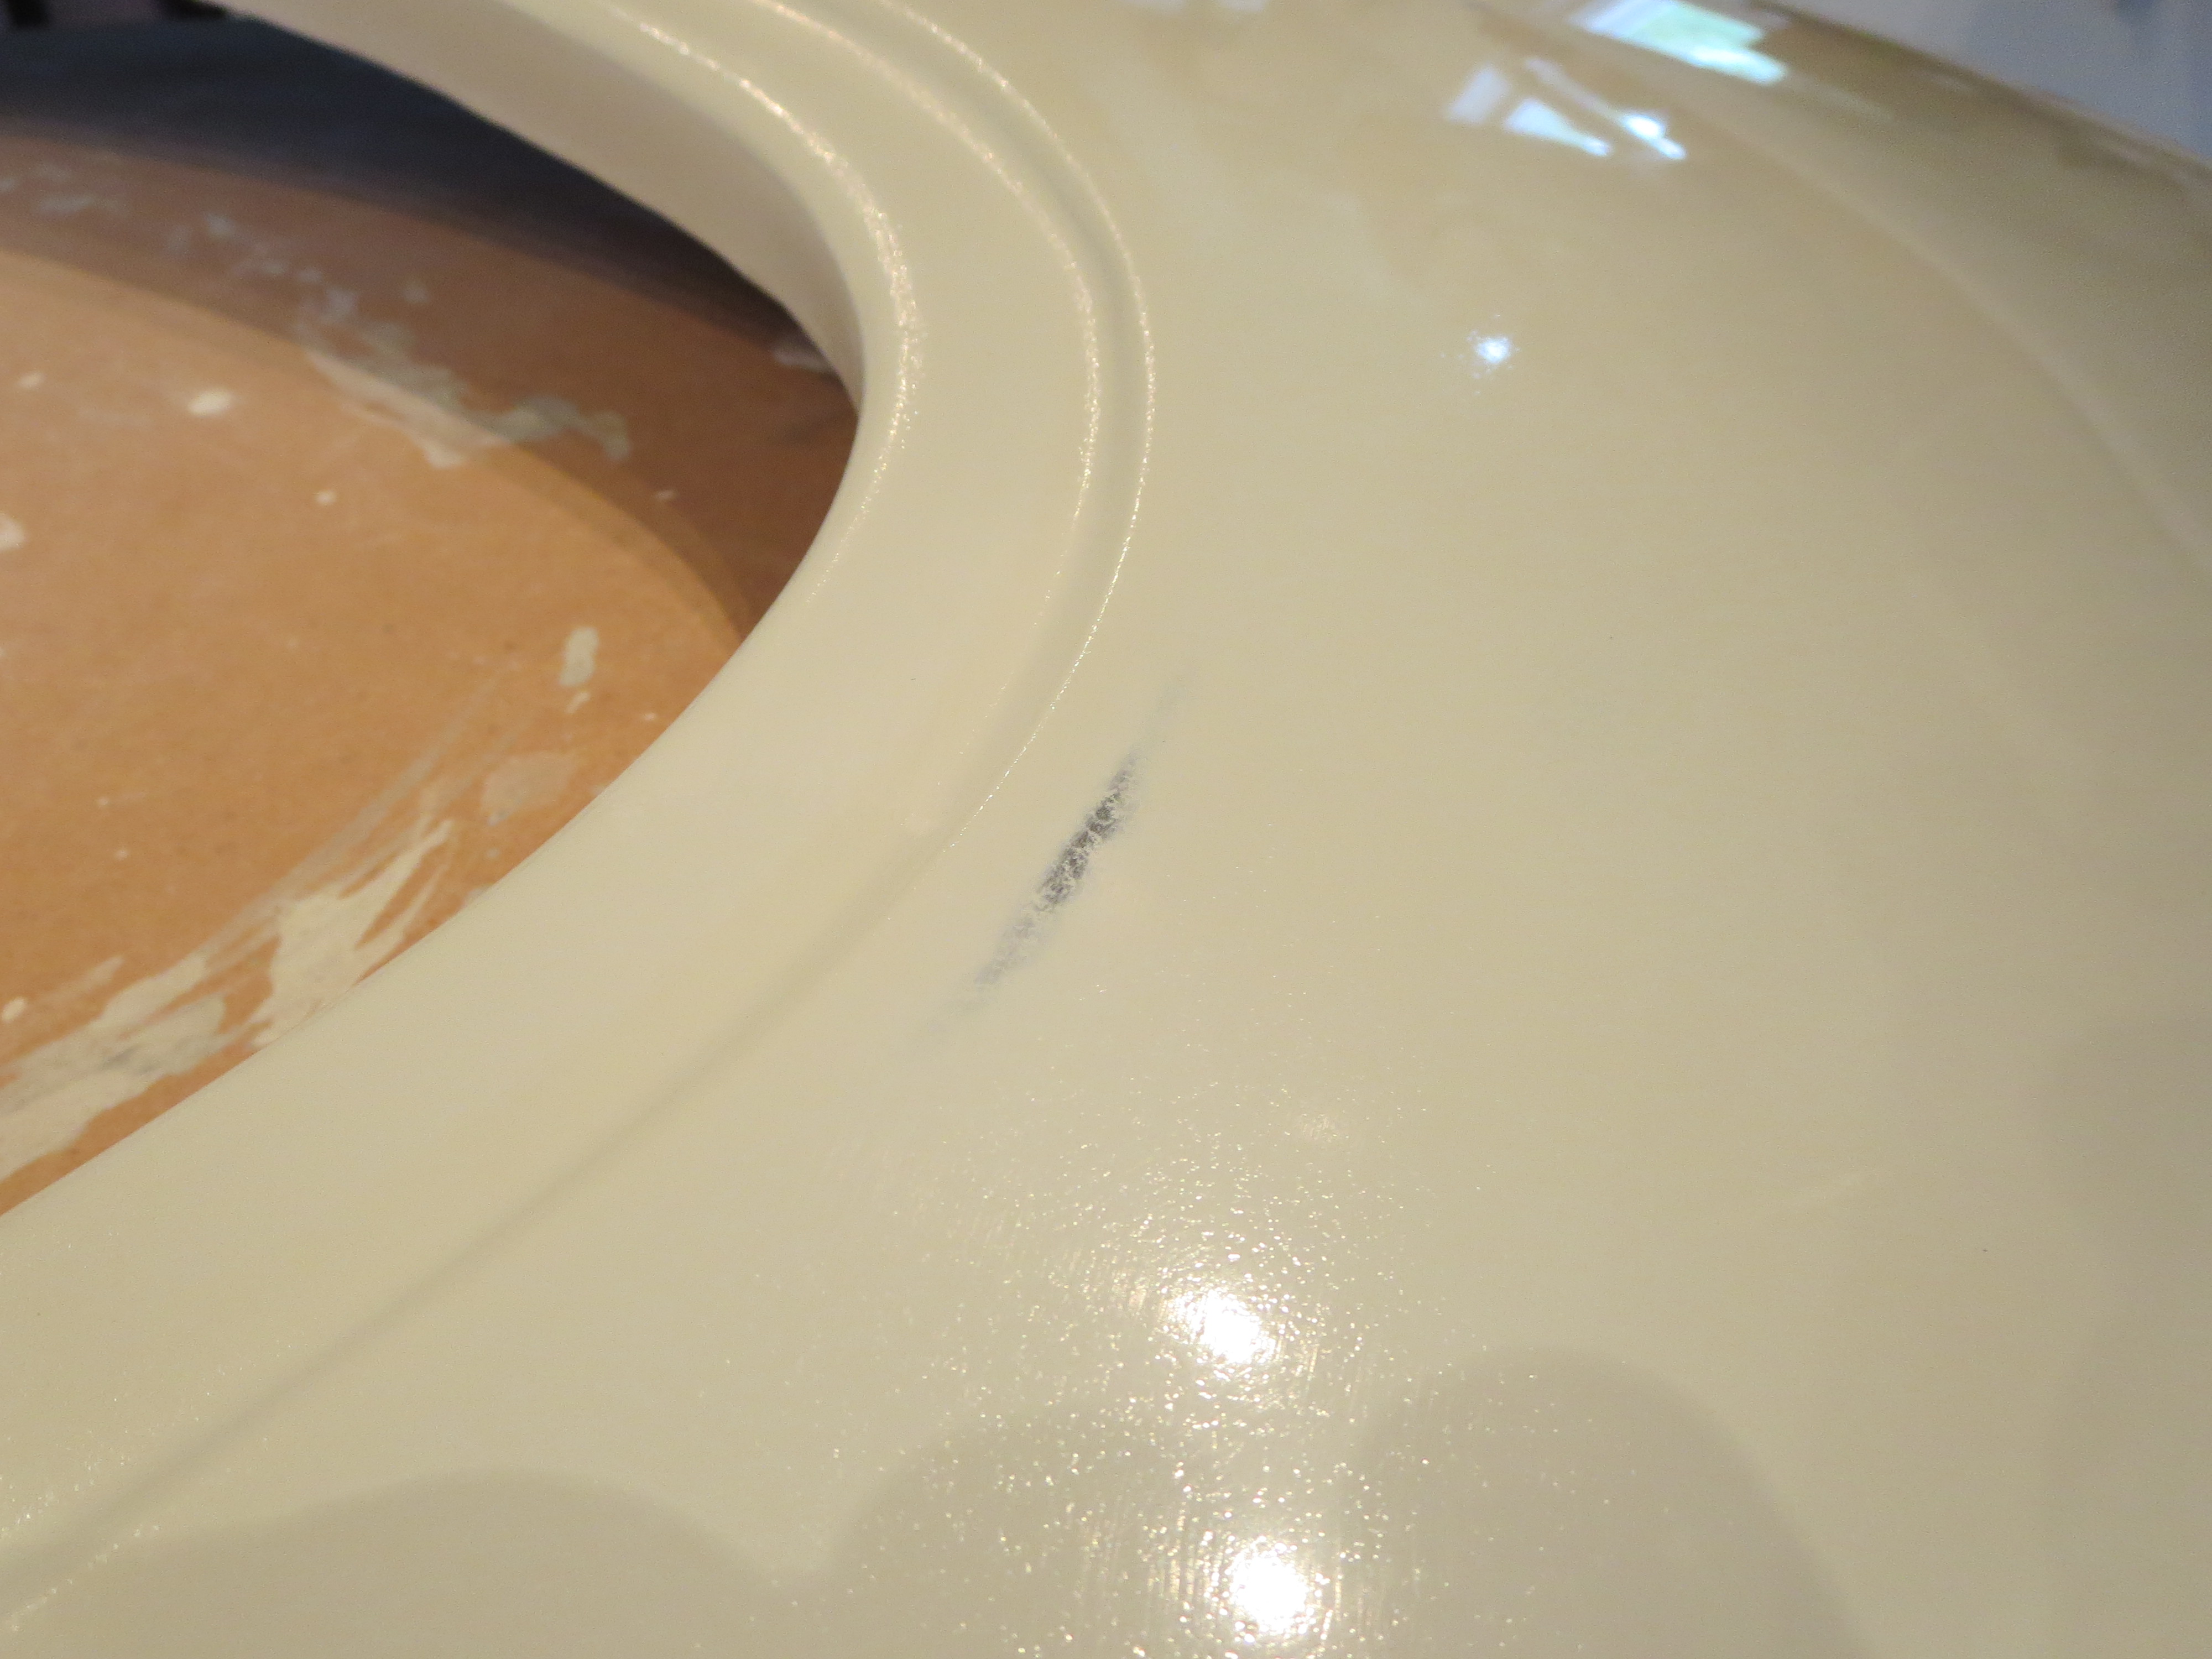
Coupled with that is that once you get close to the bottom of the valleys, the paint is getting very, very thin. There are couple of spots that thinned through. I am pretty sure that someday I will repaint the cabin, but I am not looking forward to it.
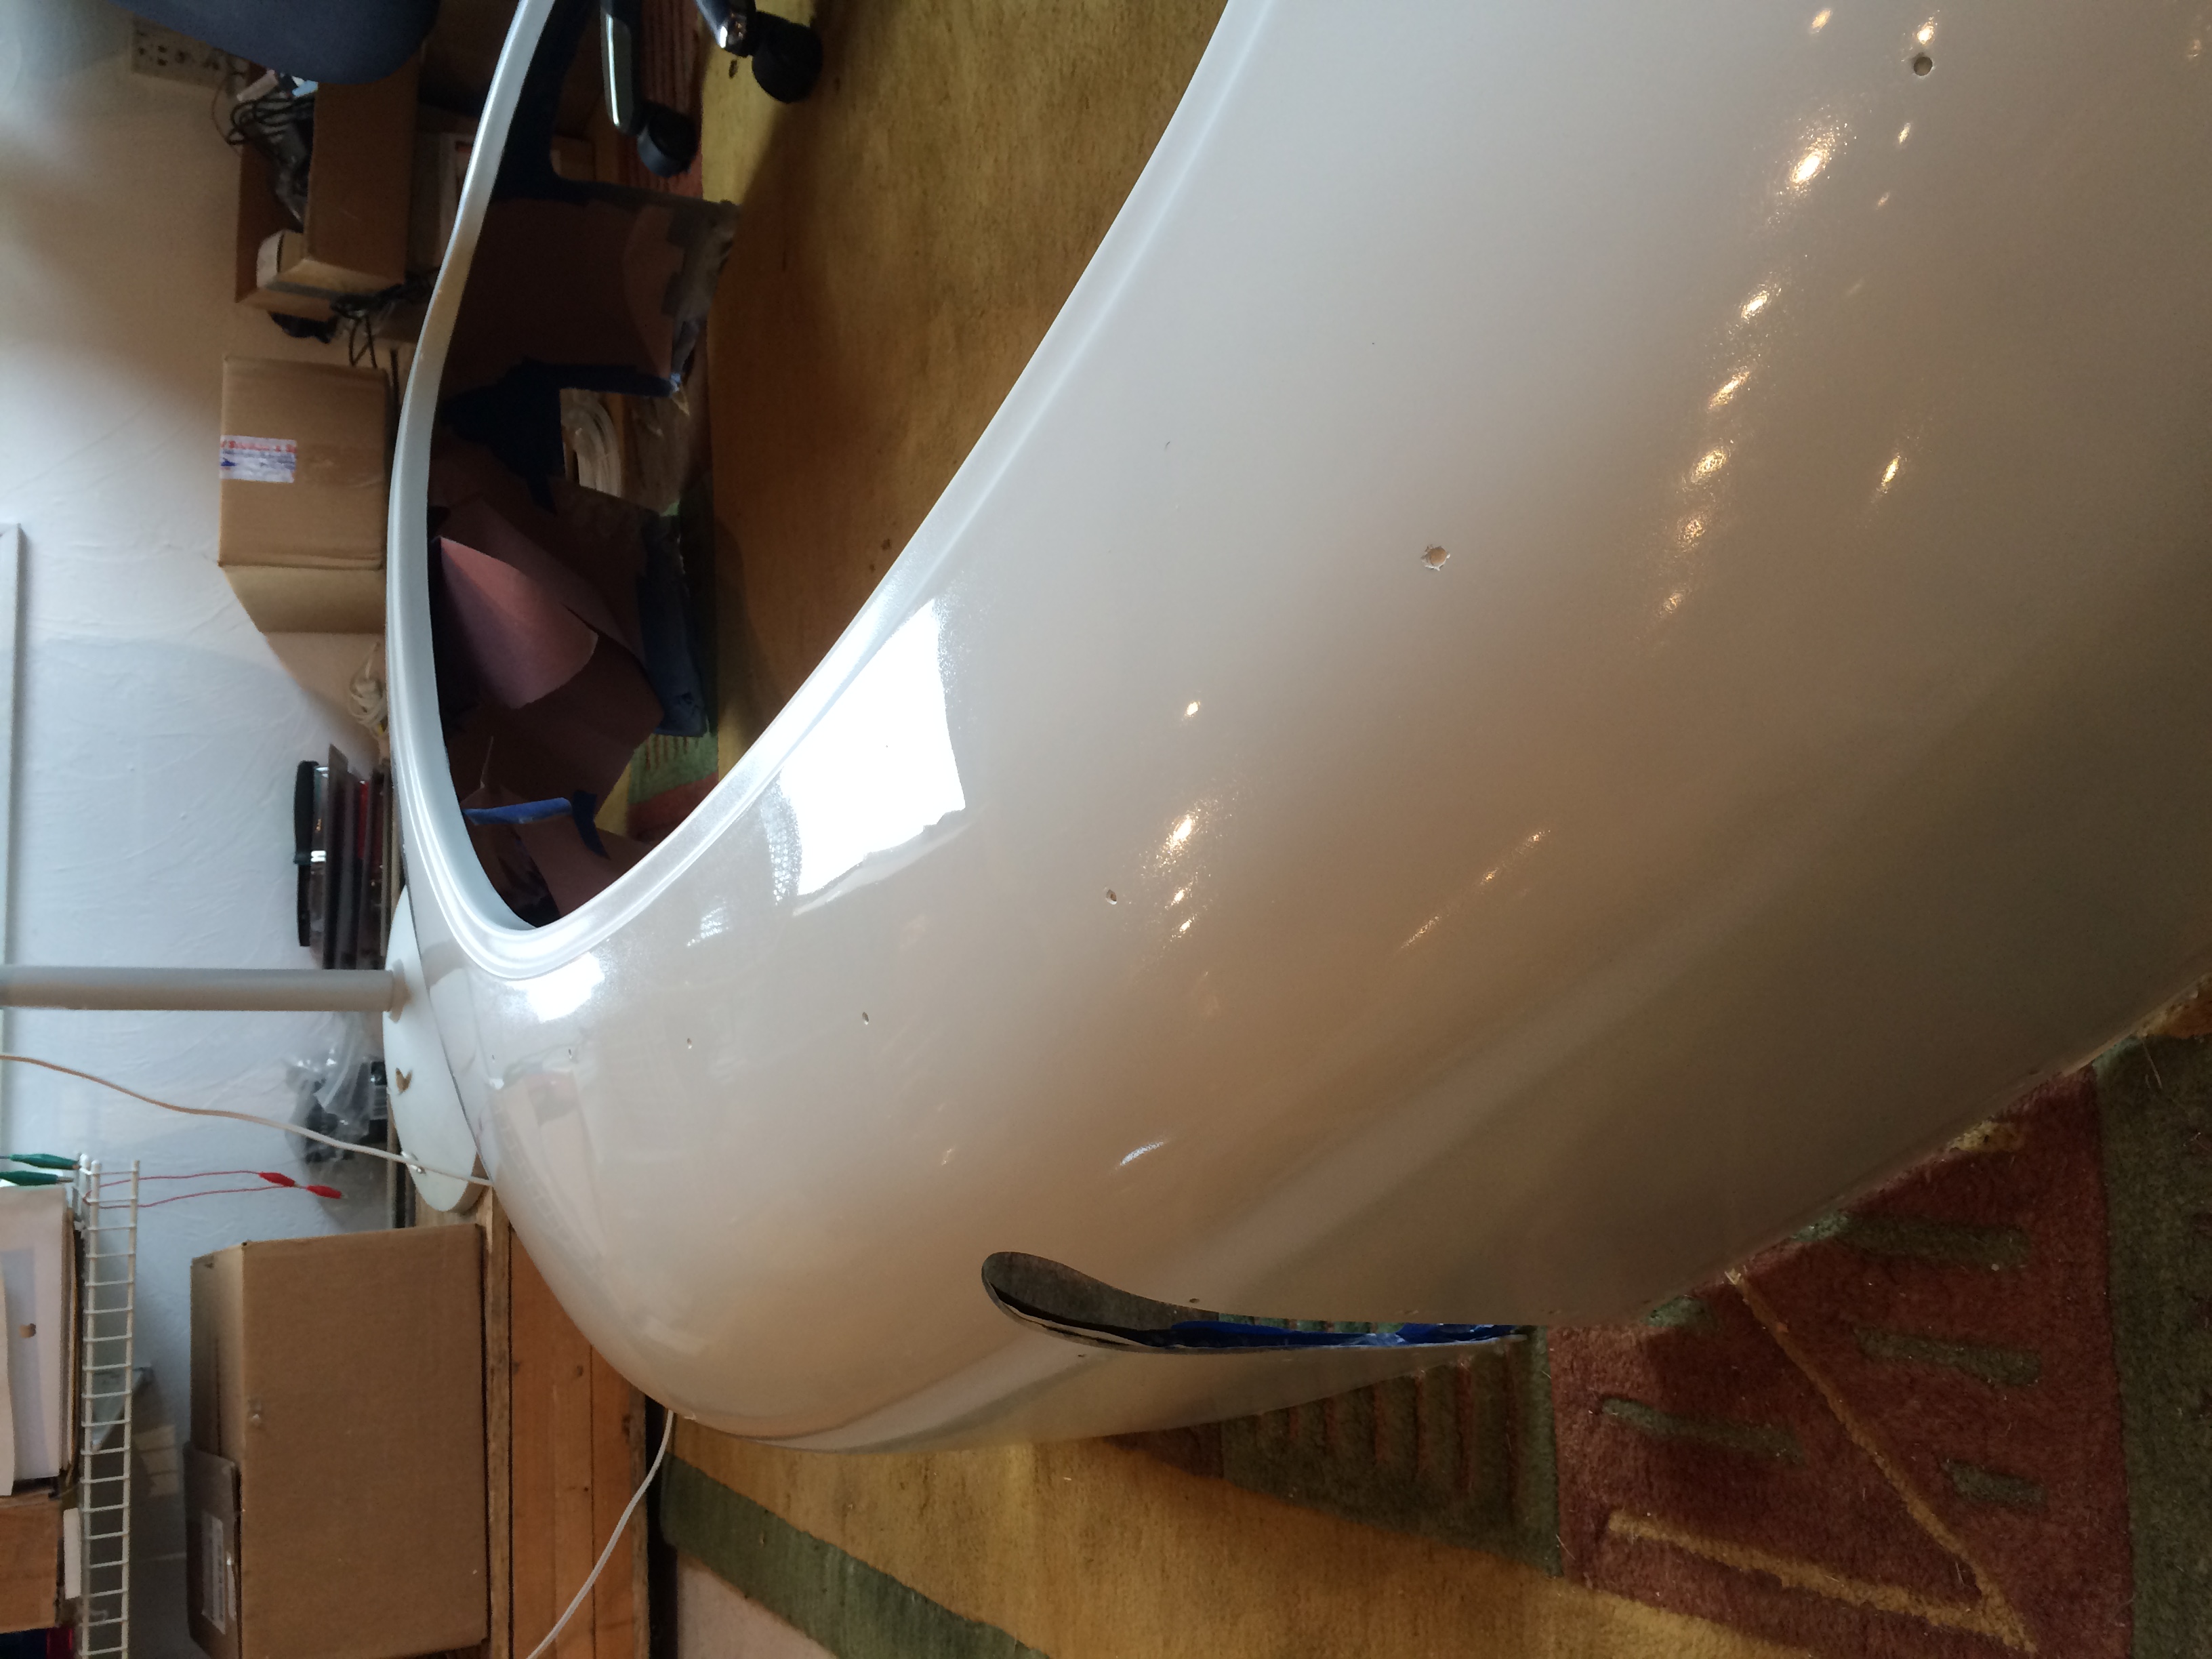
After all that, I got it to the 10-foot stage, From 10 feet away it looks OK. Closer and you start to notice the problems. I thinned it too much in 4 places. The lip around the door was impossible to smooth. I am at the point where I could spend 3 or 4 times longer than I have and it might improve, but it will never be perfect. I have decided to call the effort, continue on, and if it really bothers me down the line I will repaint the bird when it is down some winter. This is a learning experience. My next helicopter will be perfect.
Last SP Priming
10/28/14 12:38 Filed in: All
After the disastrous last priming session, I sanded down and removed most of the previous coat of primer. Then, more importantly, waited for relatively dry and mostly sunny conditions. Much, much, much better results.
I also spent a whole lot more time tweaking the gun for a good spray pattern and quantity. This is kind of a matter of feel as much as anything else.
The interior of the cabin will be painted with a Rustoleum "Simply Stone" textured paint. It's kind of like spatter paint from old car trunks. The seat pan top and instrument pod will be satin black for low reflections.
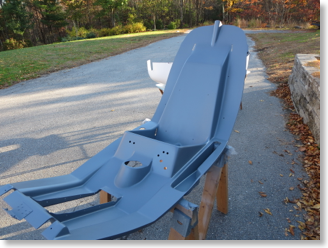
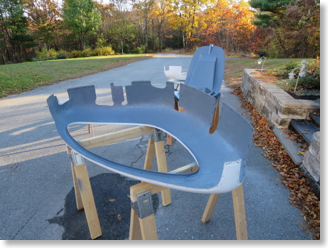
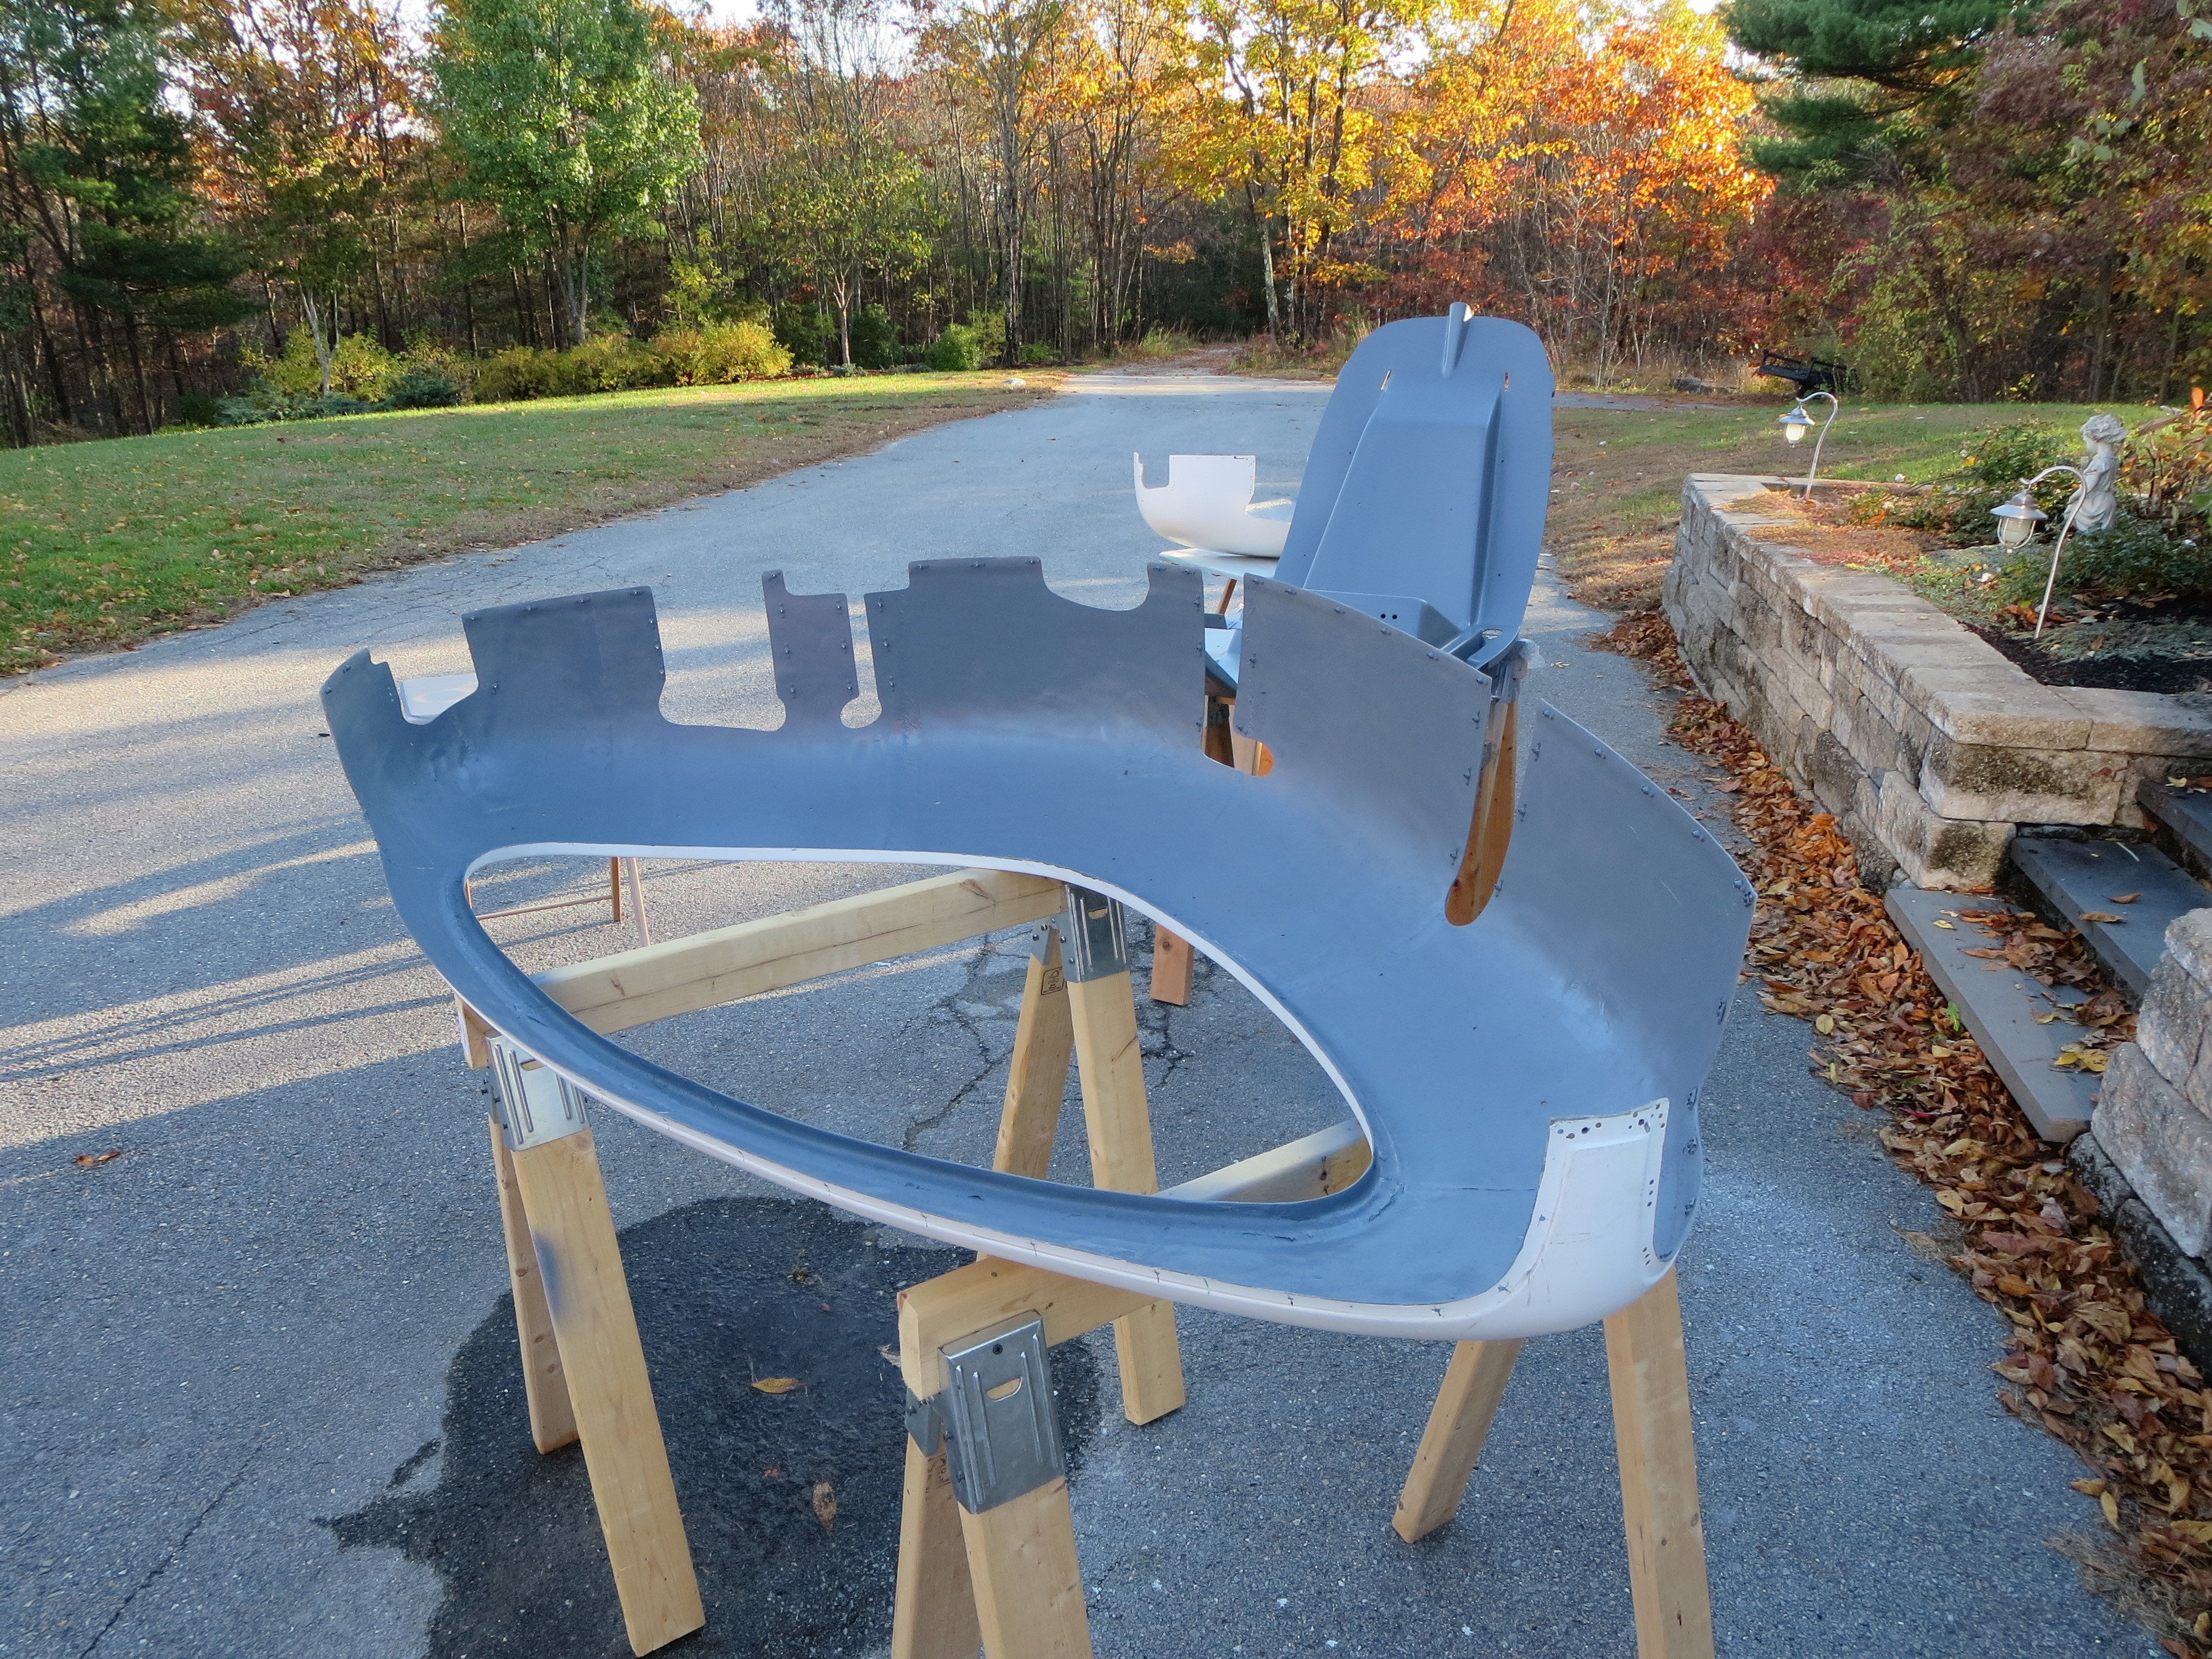
More SP Priming
10/21/14 12:14 Filed in: All
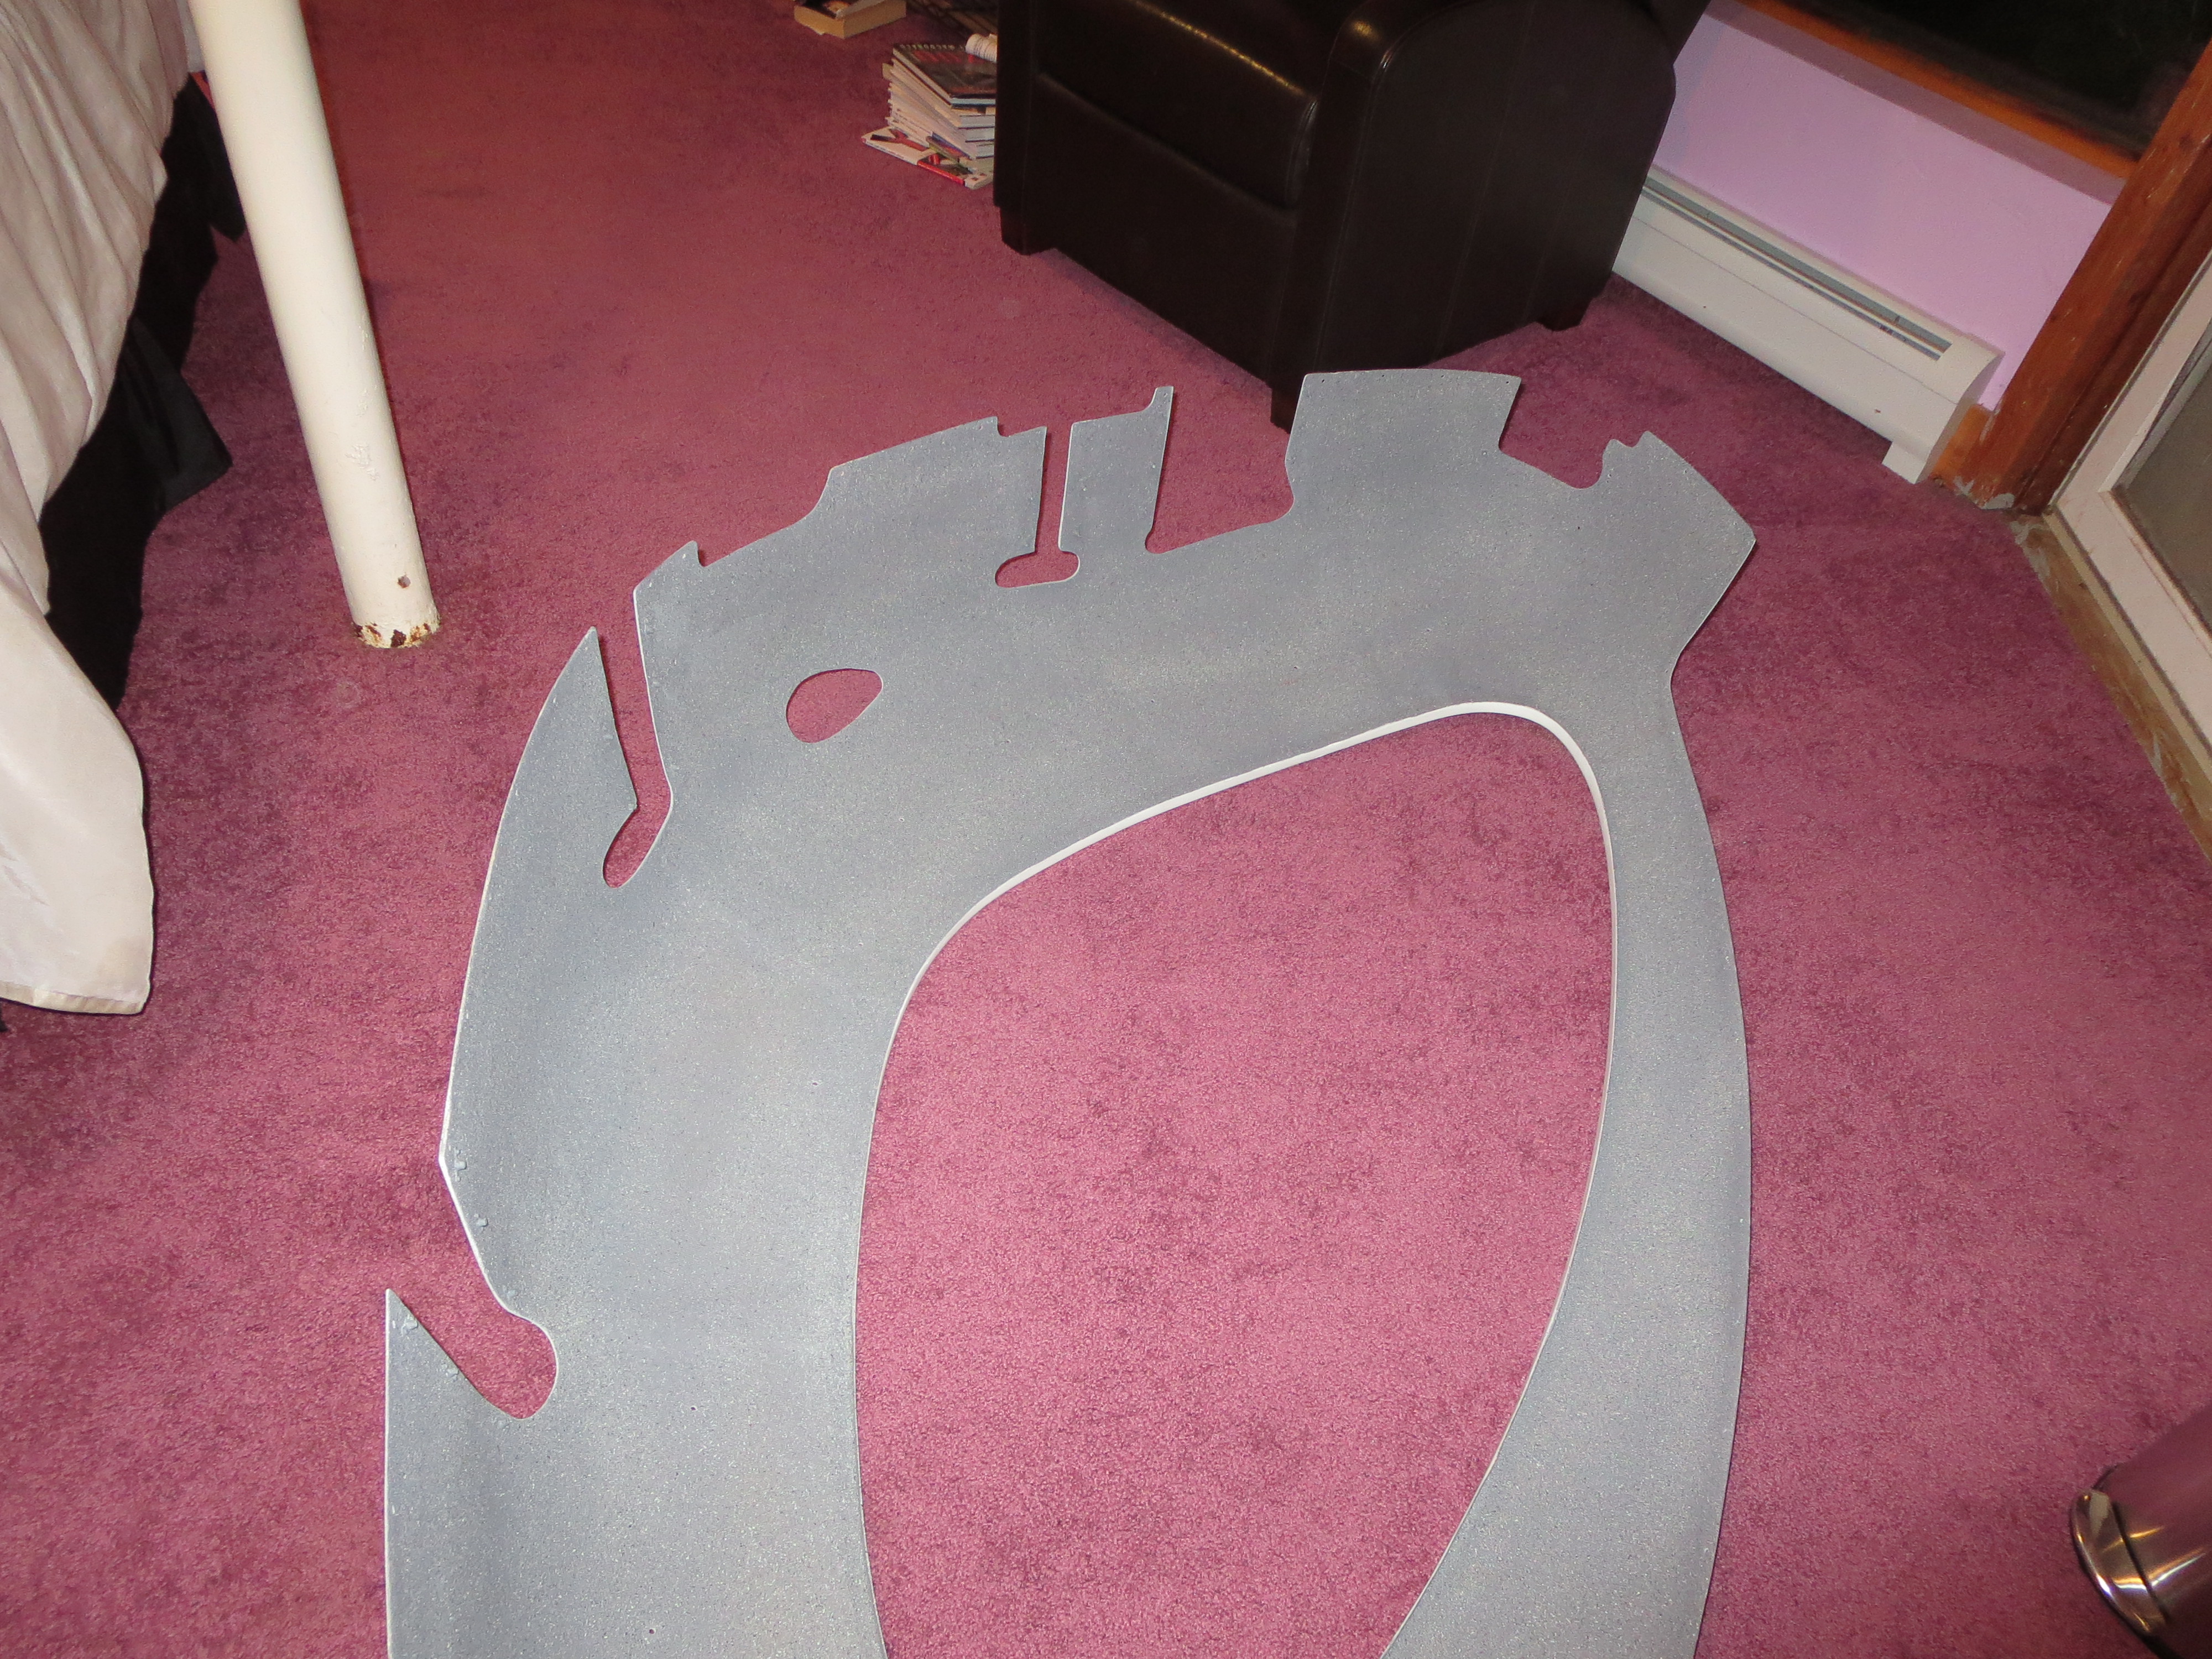
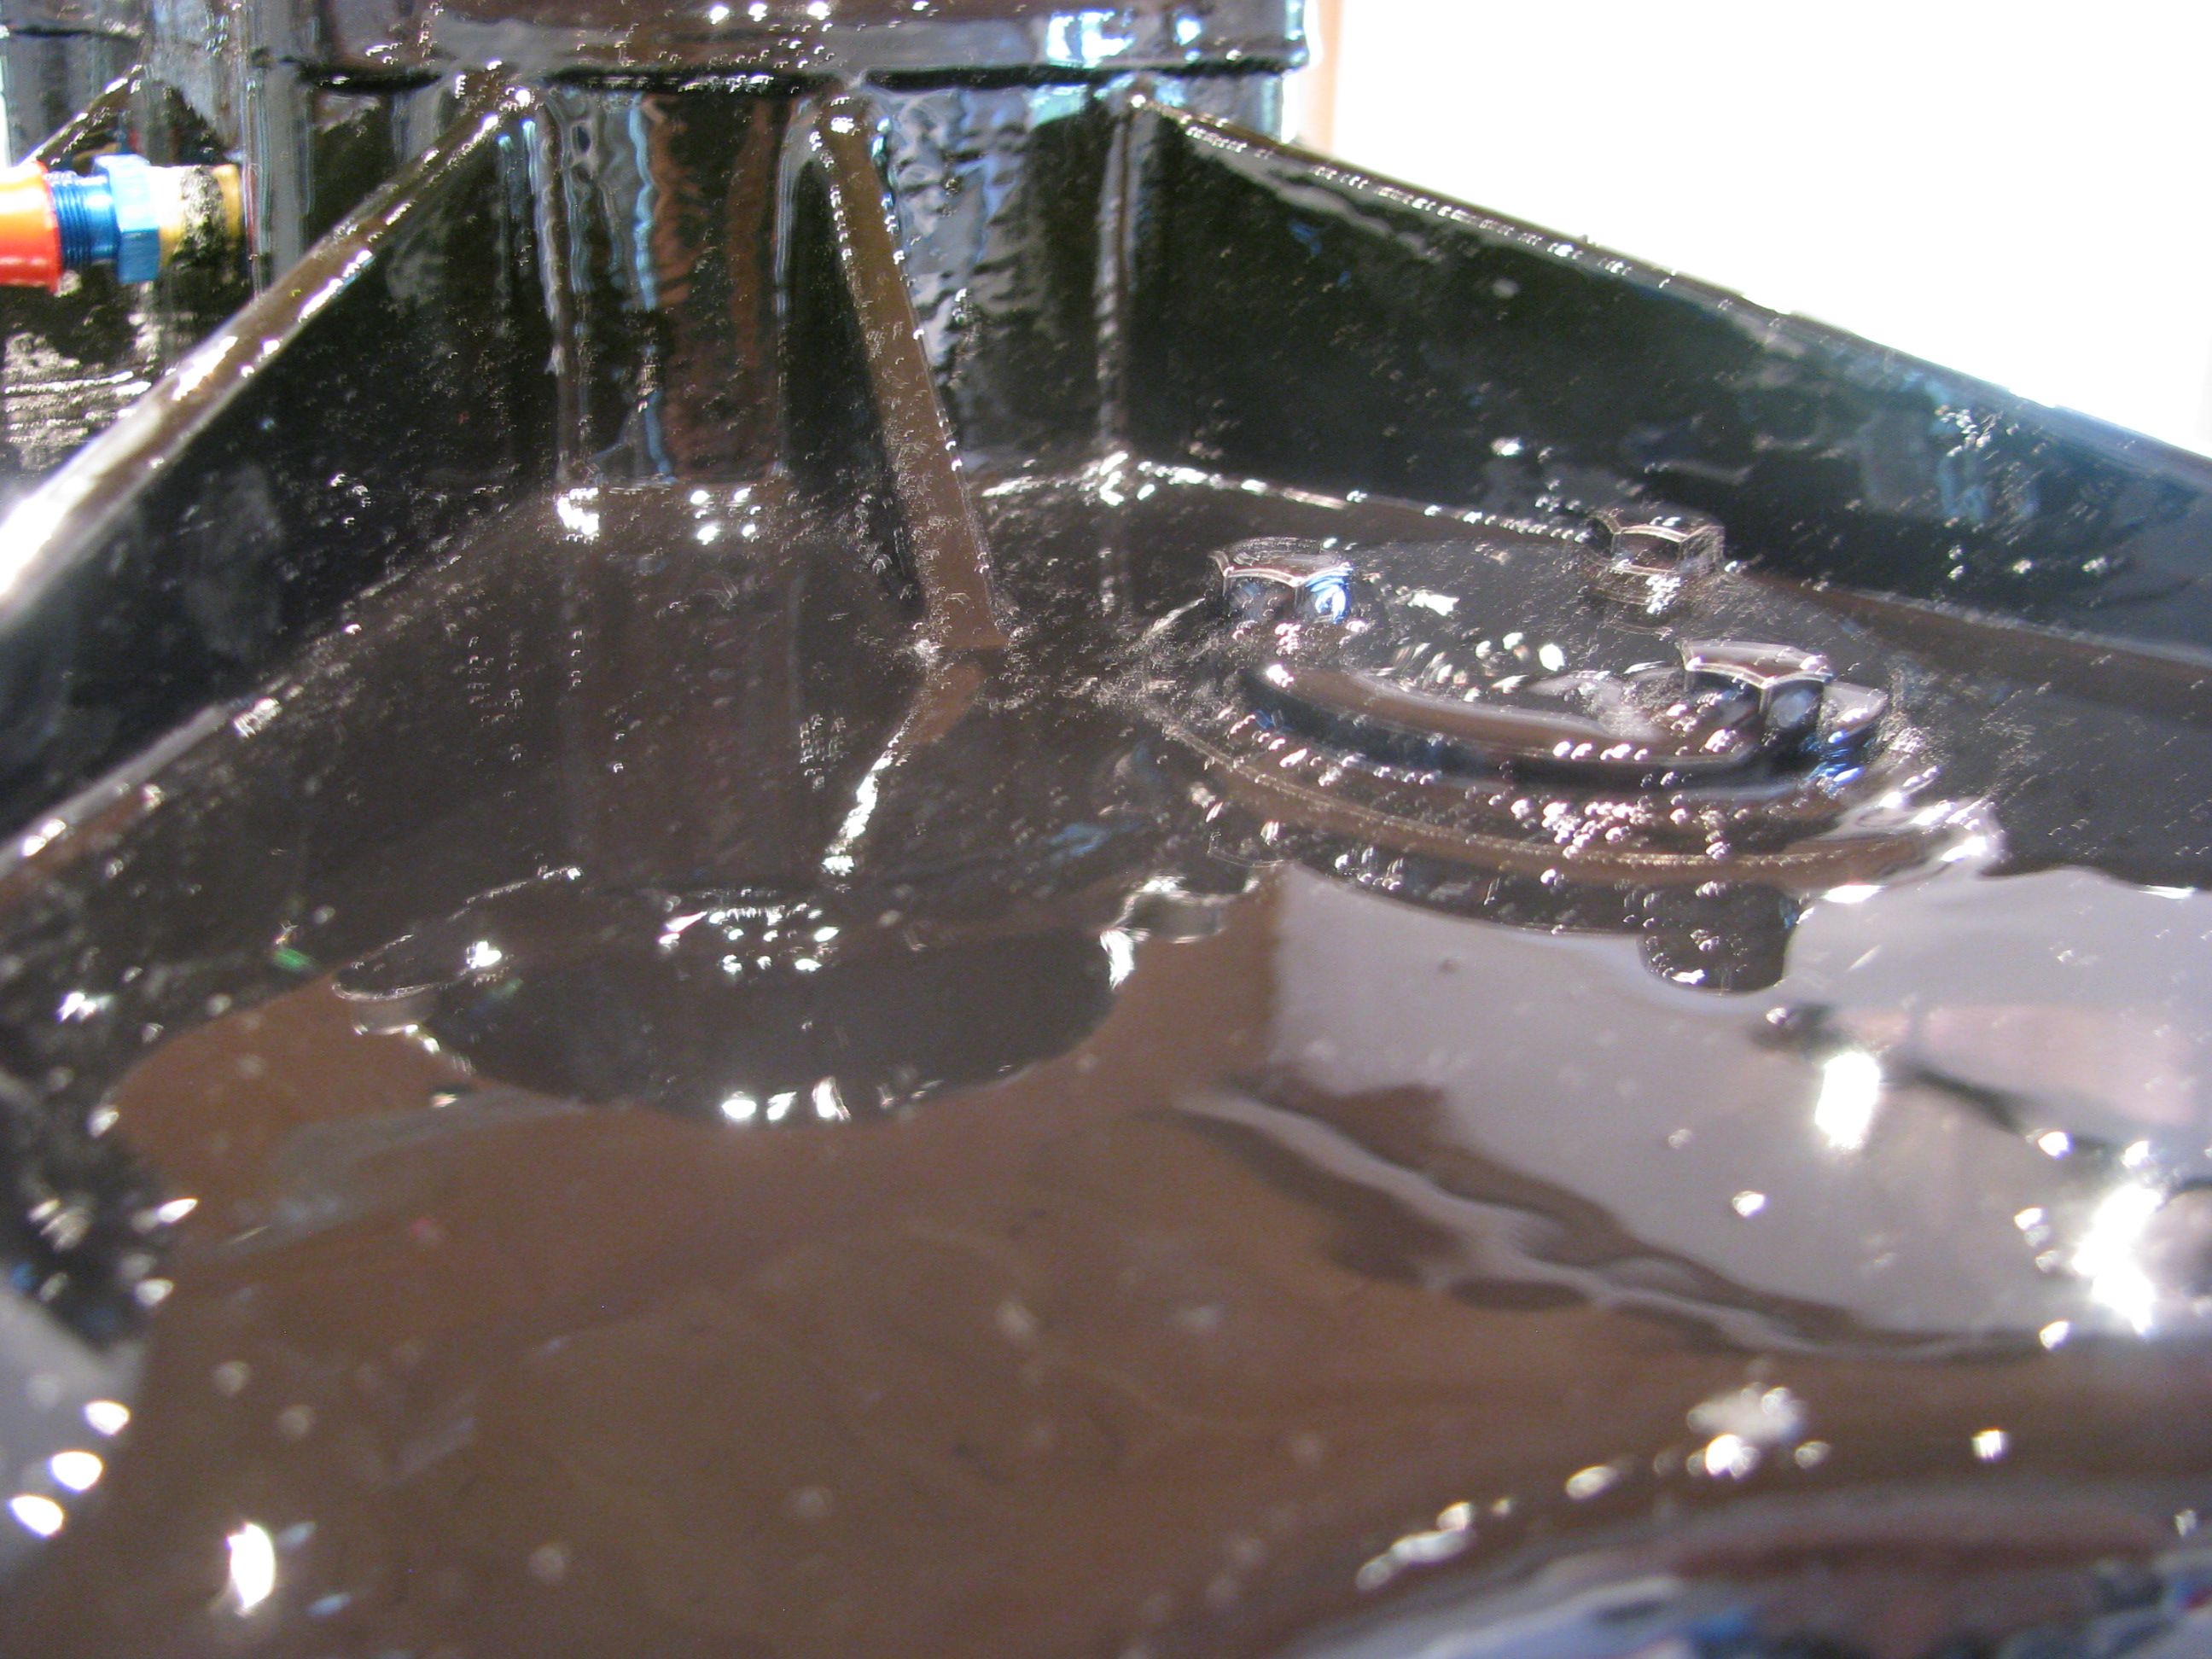
Lulled into smugness over how easy the primer worked out on the back side of the seatpan, I filled and sanded the top side and primed it too as well as the panel.
DISASTER. Right when I was thinking this painting stuff wasn't too hard, this thing turned into a runny, saggy, ugly mess.
Yuck! You can see the sags, runs, and droops.
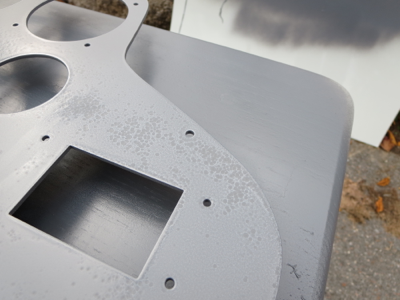
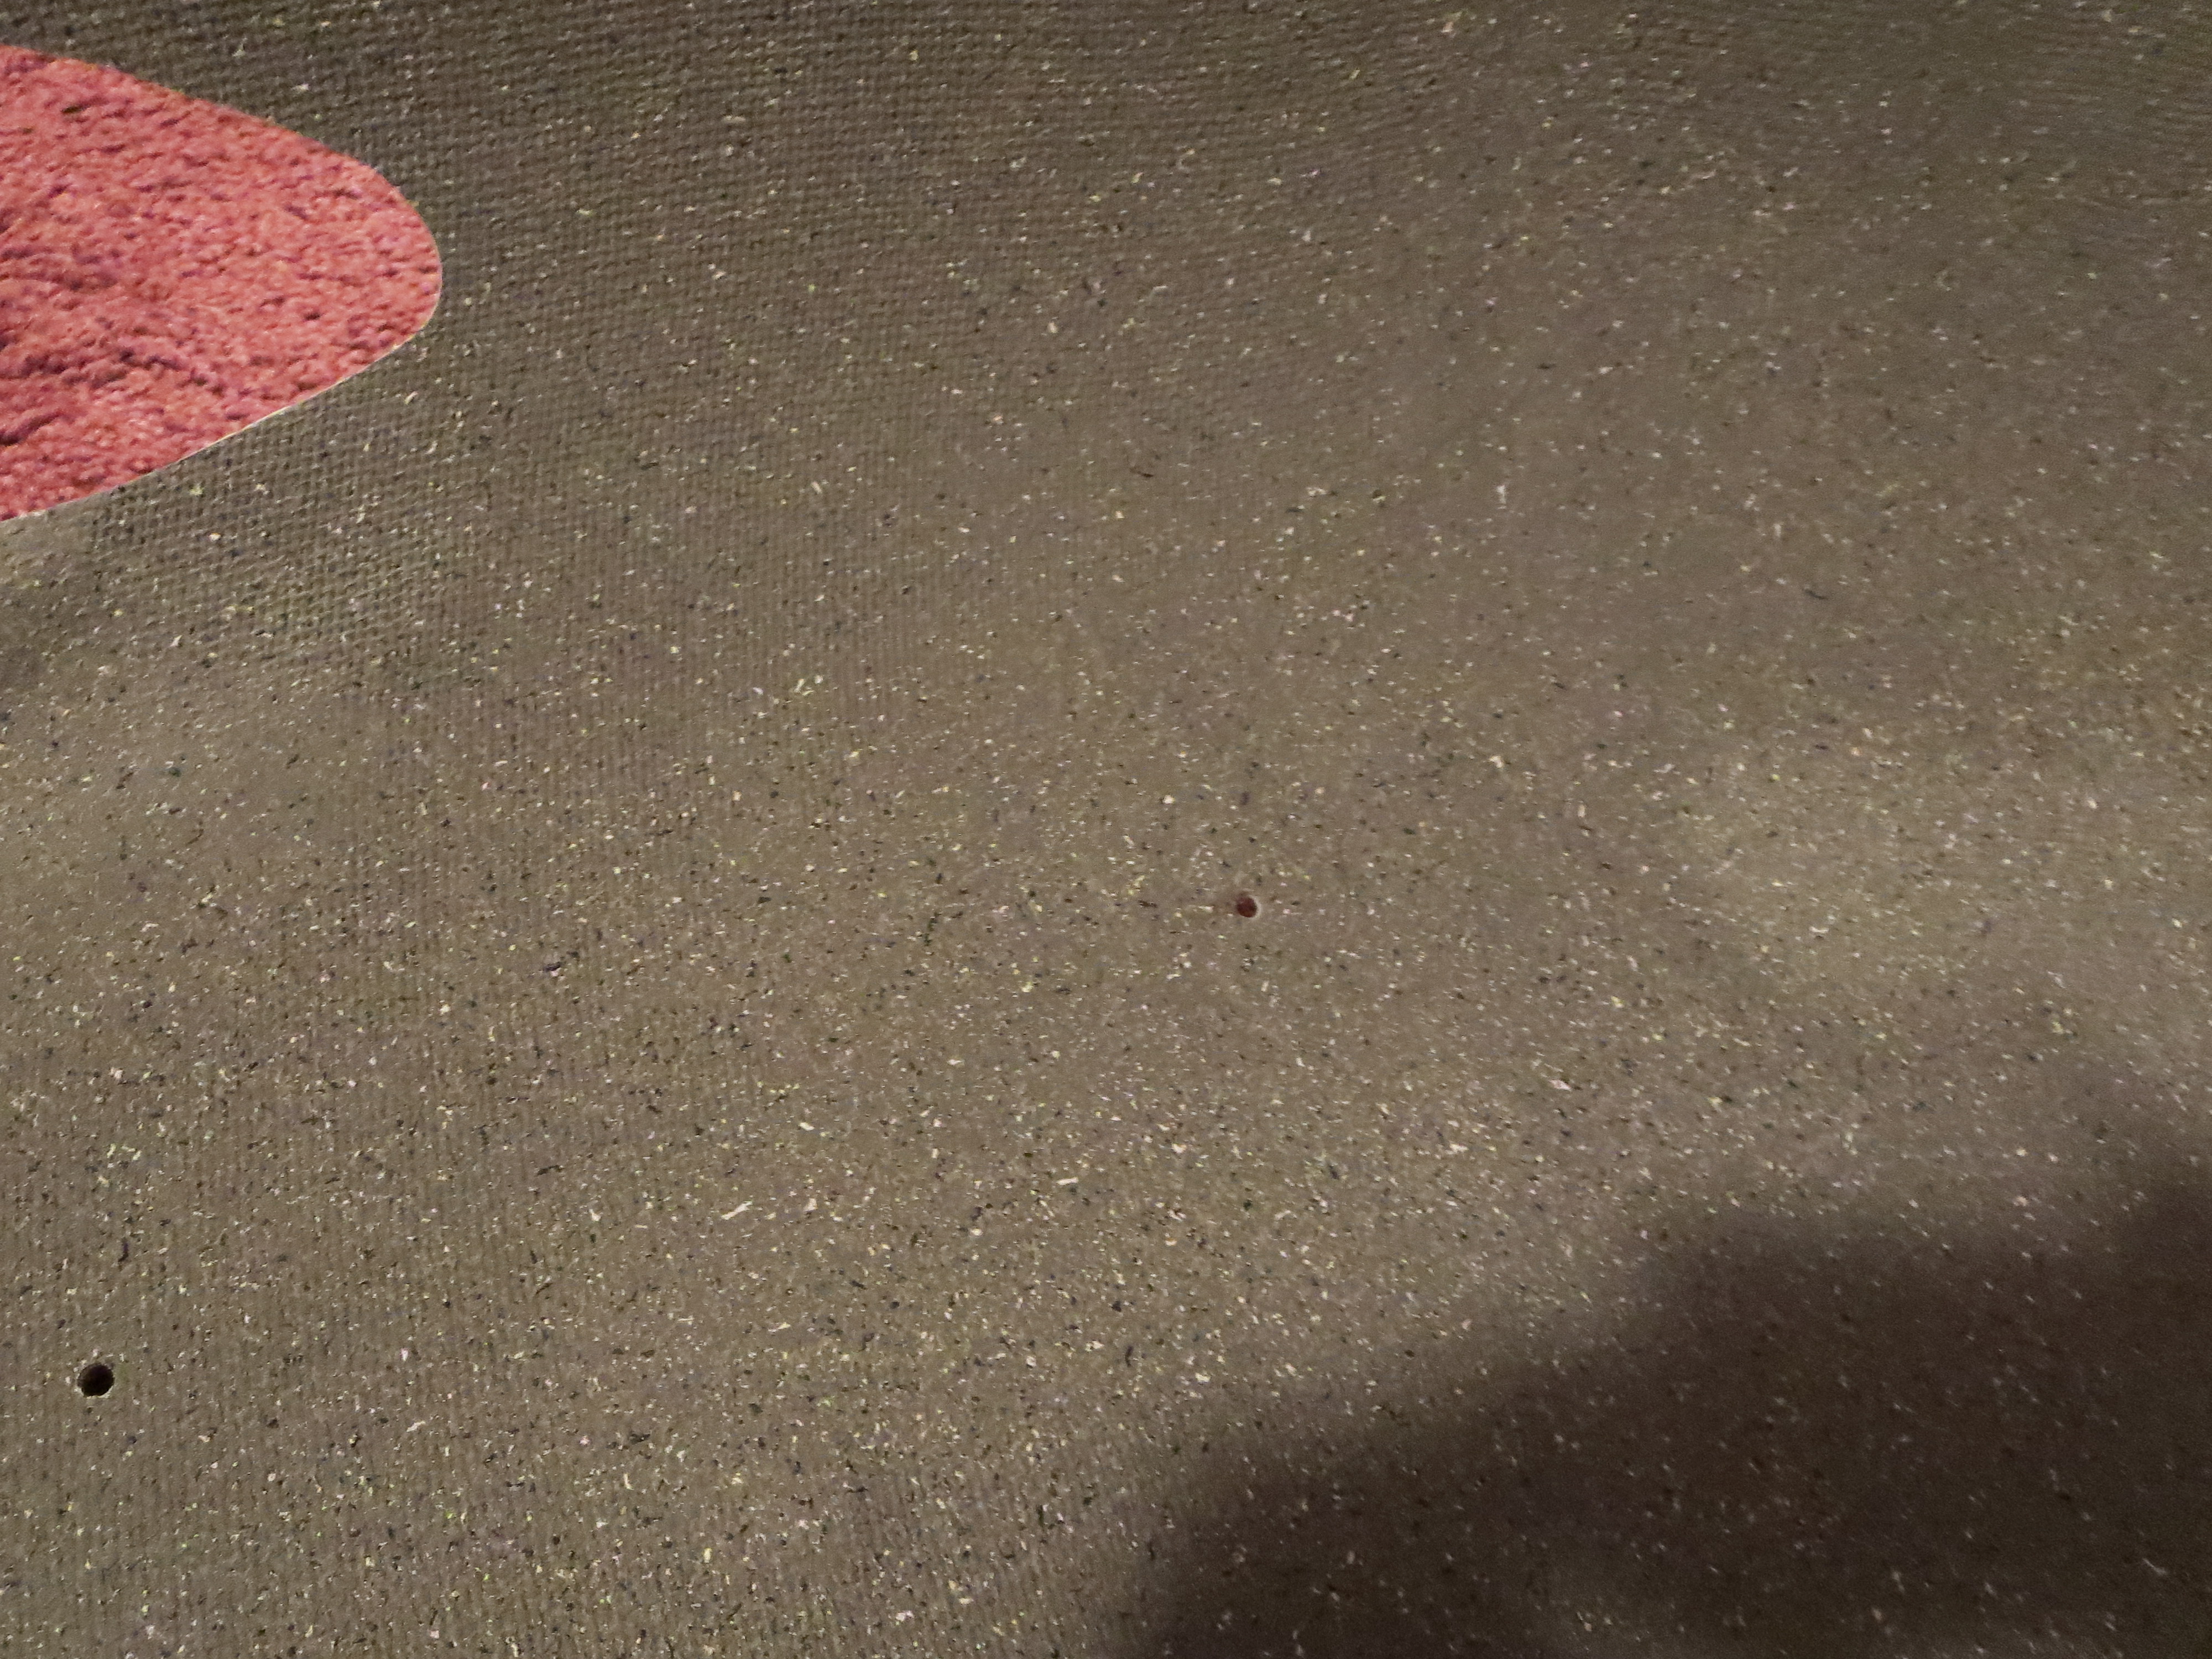
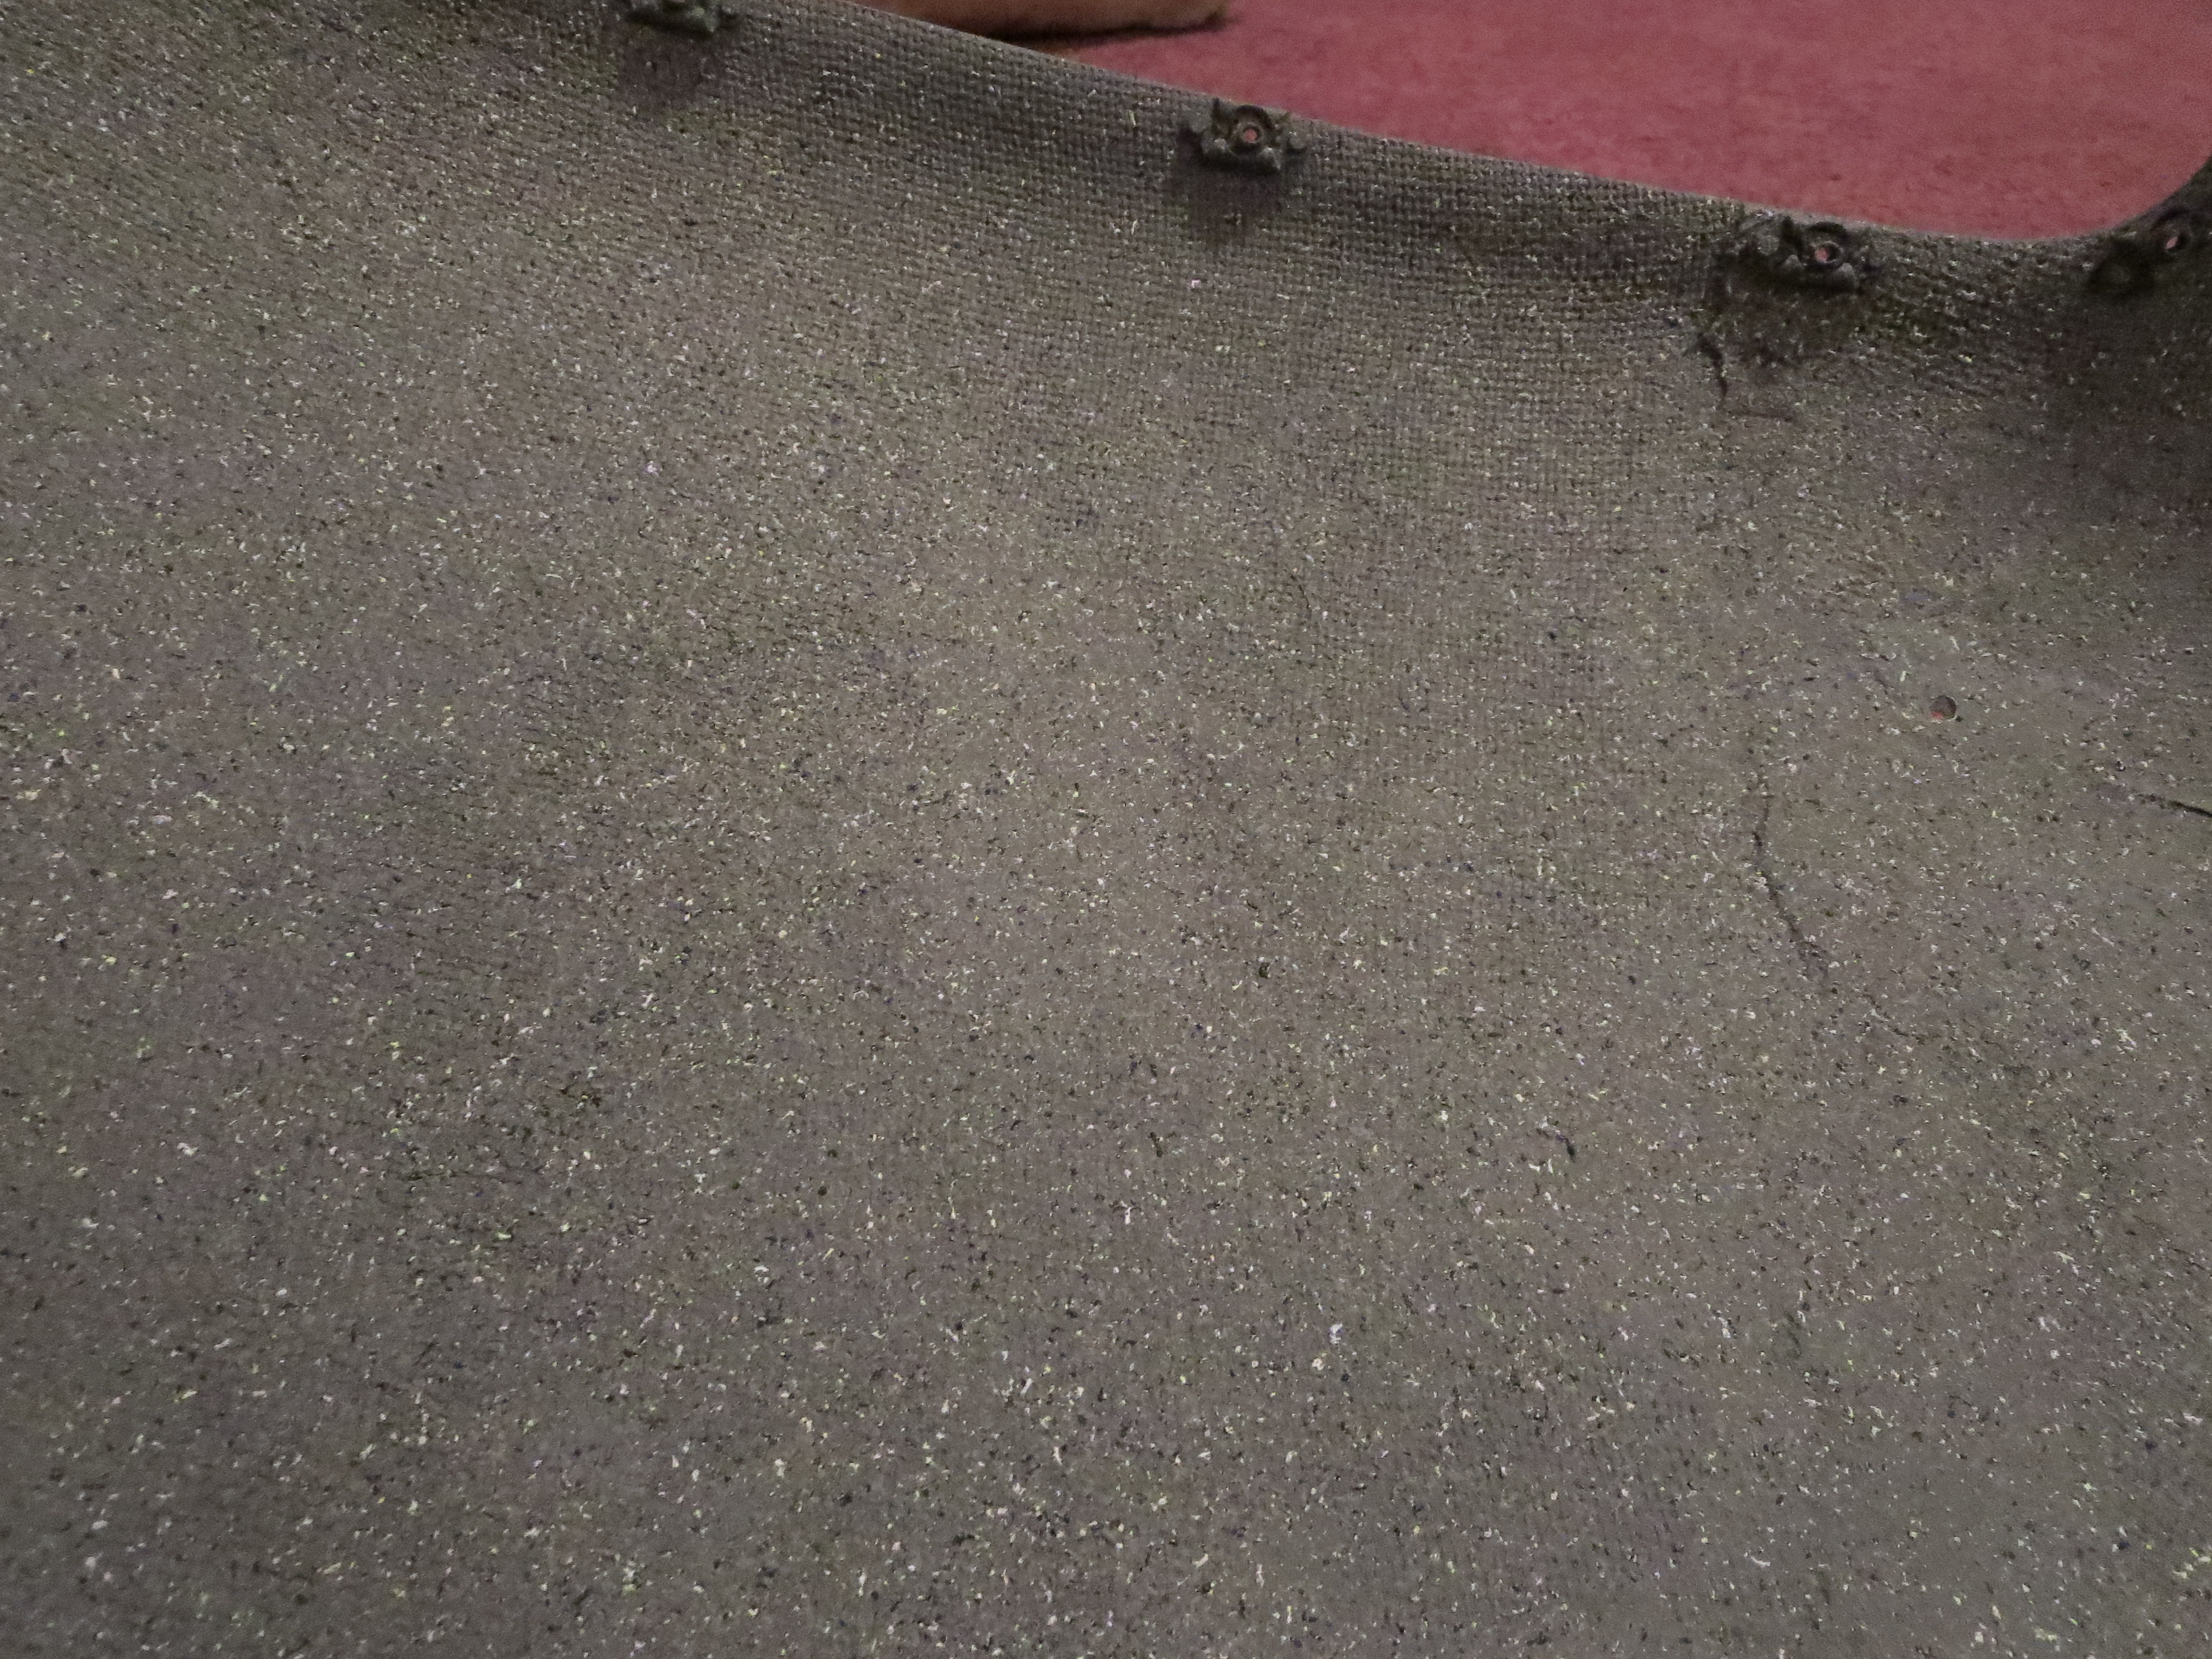
This is the cut panel blank which I primed as well. Those aren't really fisheyes. They are more dimples.
Very rough texture when dry.
Conclusion: Weather, weather, weather. Whereas when I primed the rear of the pan, the day was sunny and dry, the day I did the top side was cloudy and overcast and the humidity was relatively high. It was supposed to rain that afternoon and I wanted to get the primer on before it turned wet. Because of the moisture in the air and the lack of sun I think two things happened. 1) When I did my final wipedown with IPA, it never evaporated all the way. I think that is why the panel has the dimples. There was still residual IPA in the pores of the aluminum. 2) Because of the moisture and lack of sun, the primer did not dry or flash as quickly. The longer to stayed on wet, the more it sagged and ran.
This epoxy primer is tough stuff, so this will be laborious to sand off and start again, but that is the price to pay for getting too cocky about painting. At least it was the only primer. My lesson is learned and I will redouble my attention to conditions.
Lesson learned.
DISASTER. Right when I was thinking this painting stuff wasn't too hard, this thing turned into a runny, saggy, ugly mess.

Yuck! You can see the sags, runs, and droops.

This is the cut panel blank which I primed as well. Those aren't really fisheyes. They are more dimples.
Very rough texture when dry.
Conclusion: Weather, weather, weather. Whereas when I primed the rear of the pan, the day was sunny and dry, the day I did the top side was cloudy and overcast and the humidity was relatively high. It was supposed to rain that afternoon and I wanted to get the primer on before it turned wet. Because of the moisture in the air and the lack of sun I think two things happened. 1) When I did my final wipedown with IPA, it never evaporated all the way. I think that is why the panel has the dimples. There was still residual IPA in the pores of the aluminum. 2) Because of the moisture and lack of sun, the primer did not dry or flash as quickly. The longer to stayed on wet, the more it sagged and ran.
This epoxy primer is tough stuff, so this will be laborious to sand off and start again, but that is the price to pay for getting too cocky about painting. At least it was the only primer. My lesson is learned and I will redouble my attention to conditions.
Lesson learned.
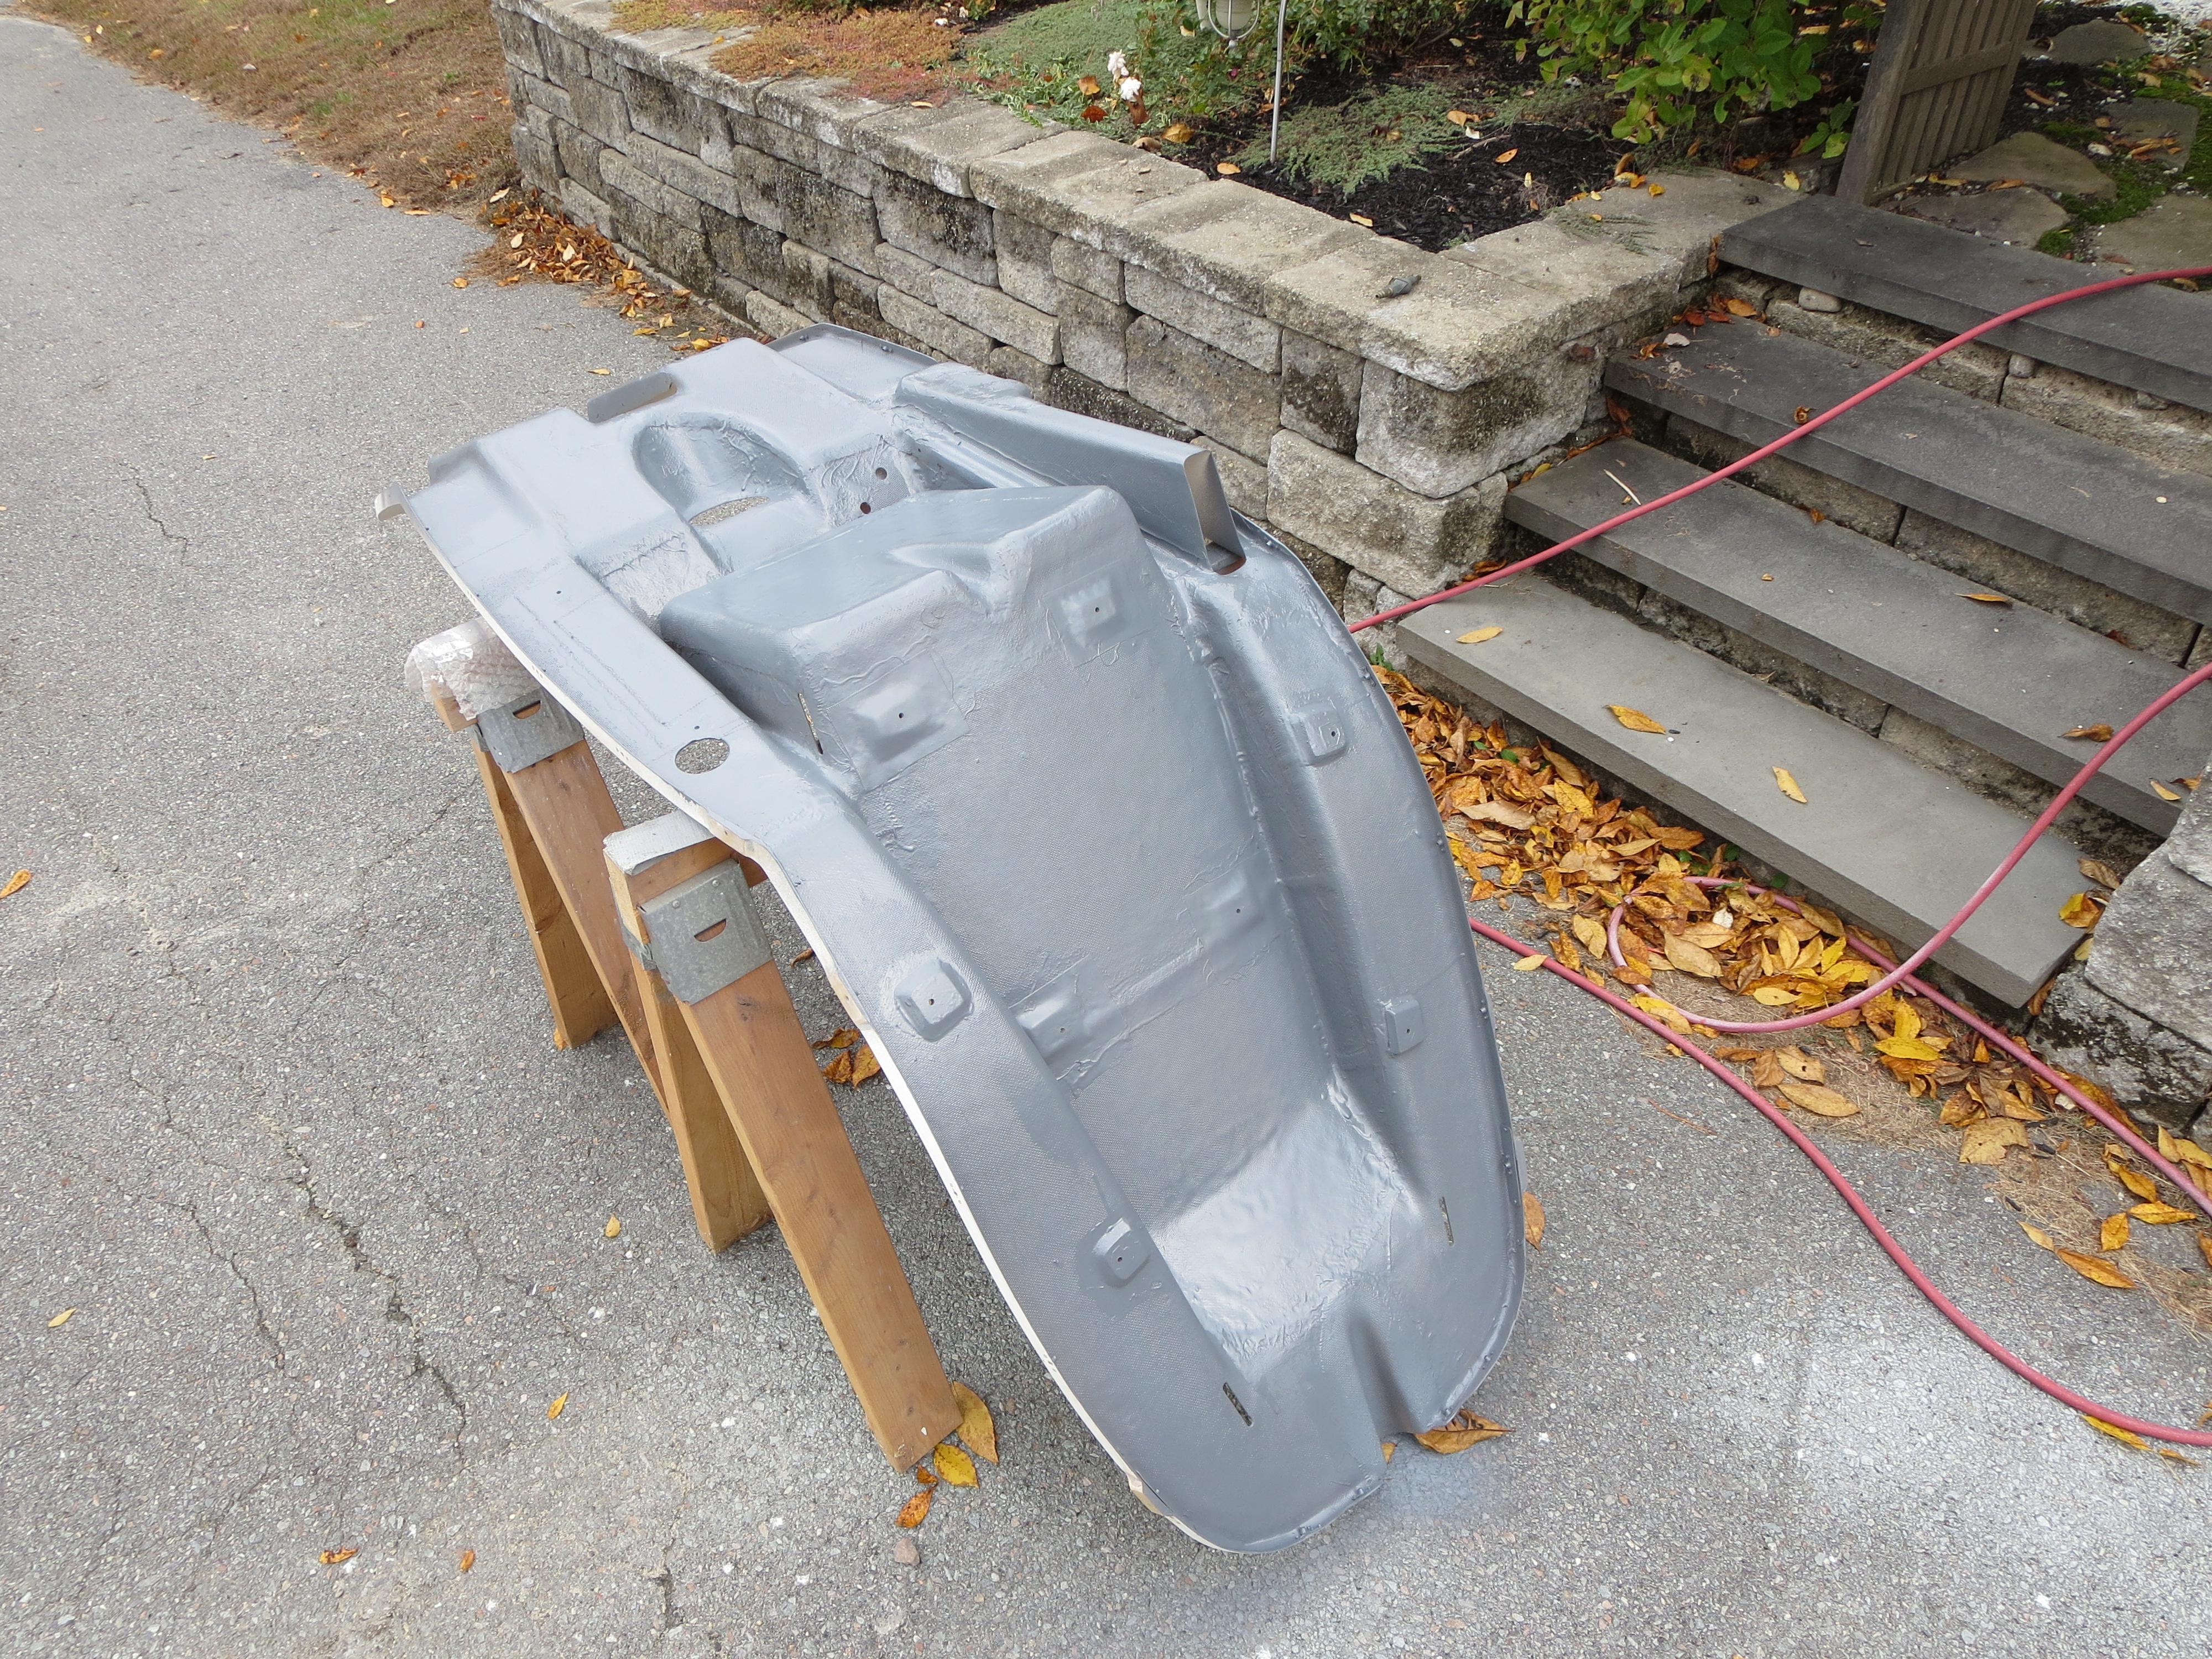
Seat Pan Rear Priming
10/18/14 12:04 Filed in: All
Since winter is rapidly approaching it is time to get painting out of the way while the weather is not impossible.
I broke out my Eastwood 2-part epoxy primer for a quick couple of coats to seal the rear of the pan. This stuff flows nicely and surprisingly almost exactly matches the color of the plastic used on the fuel tanks.
I am not too concerned about the finish on the backside of the pan. This is just a sealer, for the most part.
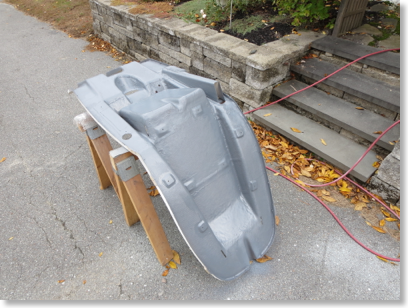

Fin Painting
11/02/13 17:48 Filed in: All
The first “real” parts painted were the fins. This is Eastwood single-stage urethane. I first practiced on a couple sheets of aluminum I had in the shop, and good thing. There was a fair amount of fiddling with the gun and the first one was a mess.
Keeping the piece flat and getting the second and third coat relatively heavily allowed for a nice flow out. Very smooth. A little orange peel. Not much.

My one flaw is on the underside of the horizontal fin. The Fin slipped down the jig on which I had it and stuck to the piece of MDF I had underneath it. I will have to scuff this and repaint this side.

This is the vertical fin. Overall I am happy with the result. The only issue is that the Eastwood “Bright White” is not nearly as “bright” as I would have thought. It is slightly more grey than absolute white. I am getting used to it, though.
Now that the fin is painted I can select an N-Number and affix it to the fin. Progress.
Ground Plane Paint
10/29/13 17:46 Filed in: All
For the structural parts I bought some enamel paint that matched the frame powder coating. This is the ground plane for the comm antenna.
Paint Planning
04/14/12 17:40 Filed in: All
Against all recommendations and commonly accepted practice, I DO plan on painting this thing myself. The frame is already powder coated GREEN, of all things. I did not choose it, the original kit purchaser did, but have decided to live with it since changing would be a lot of work and $$$. The powder coat is in pretty good shape and I found exact color-matched touch up paint, so that’s decided.
Now maybe because I’ve been staring at it in the raw gelcoat for so long, the white has kind of grown on me. Green frame, white fins and cabin with a flat black interior (low reflections). That’s the working direction. Basic, not gaudy. Works with the green and won’t offend anyone, nor will it impress with any great inspiration or creativity either. I should be able to pull this off myself since there are no swoopy transitions and multi-color blends. I may add some trim colors, but only later and maybe with vinyl graphics.
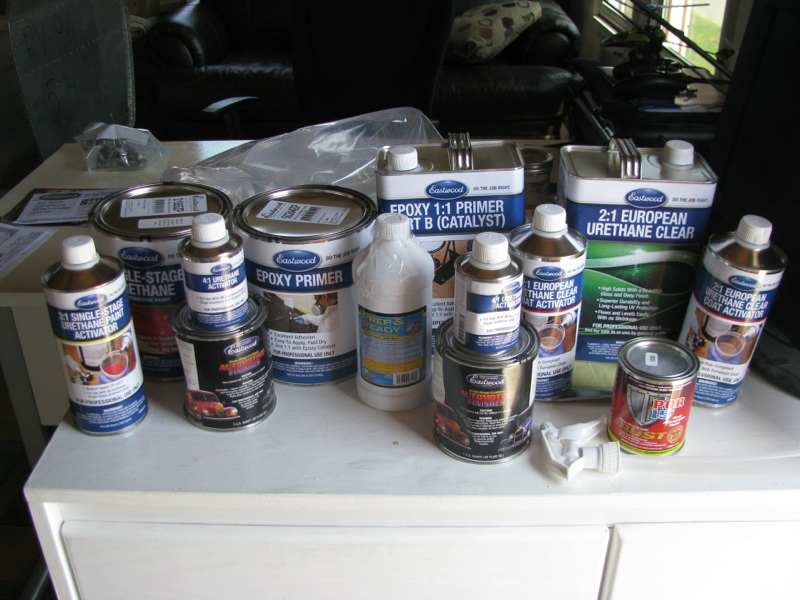
Does the table at the top look impressive? It should. That’s $450 worth of painting chemicals. I am quite sure I bought way too much flat black and not enough white, but we’ll see. Eastwood had the stuff to me within 4 days and I didn’t pay for any expedites (every can was dented, but not breached).
Now maybe because I’ve been staring at it in the raw gelcoat for so long, the white has kind of grown on me. Green frame, white fins and cabin with a flat black interior (low reflections). That’s the working direction. Basic, not gaudy. Works with the green and won’t offend anyone, nor will it impress with any great inspiration or creativity either. I should be able to pull this off myself since there are no swoopy transitions and multi-color blends. I may add some trim colors, but only later and maybe with vinyl graphics.
Does the table at the top look impressive? It should. That’s $450 worth of painting chemicals. I am quite sure I bought way too much flat black and not enough white, but we’ll see. Eastwood had the stuff to me within 4 days and I didn’t pay for any expedites (every can was dented, but not breached).
POR15 Engine Painting
05/06/12 14:07 Filed in: All

The engine has been painted with POR-15 gloss black. This stuff is really shiny and flows out oh so slowly.
The most time-consuming part was masking all the heads of the allen head bolts. That took forever and then was painful to remove as the POR really grabbed the tape.
I had to touch it up with an artists brush after removing the masking tape. but it’s finally done.
The POR-15 flows out very slowly. I can’t believe this is a brushed-on finish.
Now this is a rough casting, so I was not expecting a show quality finish, and it isn’t, but overall I a pleased with the outcome. The paint flowed out evenly and the brush marks disappeared.
It appears to be a thick, tough finish.