Tailrotor Start
03/17/12 11:48 Filed in: All
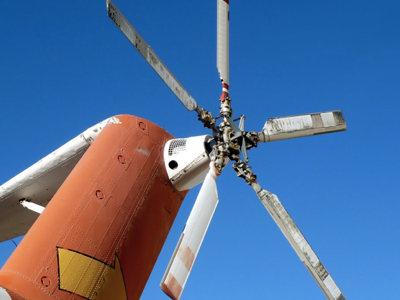
The tail rotor is the smaller rotor mounted vertically at the tail of the helicopter. Its primary function is to counteract the torque created by the engine that would attempt to spin the fuselage in the opposite direction of the main rotor were it not present.
The pilot uses foot pedals to control the amount and direction of force exerted by the tail rotor to counter to the engine torque and thus control the direction the helicopter is pointing. Whenever the amount of power extracted from the engine is changed (climbing or descending), the amount of force needed from the tail rotor must be adjusted by the pilot to keep the helicopter pointing straight ahead.
The Helicycle kit comes with a largely assembled tail rotor since it is a very critical component and must be precisely constructed and balanced. My tasks consist of mounting, aligning and fabricating the control components.
Start by fabricating the control arms from 1/8” aluminum. Cut out according to the drawing, drill appropriate holes and open up a slot for the slider studs to ride in. I don’t know why, but I did this the hard way by drilling starter holes and opening up the slot with a file. As soon as I started I kicked myself for not setting up the mill and machining out the slot.
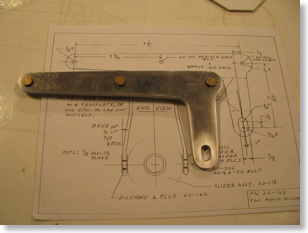
Doing it by hand is definitely not as precise. At one point in the slide there is a tiny bit of slop in the slot between the sleeved bolt and the aluminum. Probably 0.005” - Just enough to “tick” back and forth. I haven’t decided if this is enough to make me go back and fabricate new parts. I think I will see how much play there is when the whole thing is assembled. There are multiple bends and the slop may be “eaten” up by tolerances elsewhere. If there is any play when the tail rotor is installed I will re-fab the parts as I am guessing the tail rotor must be completely slop-free as it is subject to high frequency vibrations and much stress.
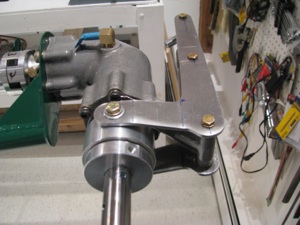
Bent and assembled the control arm scissors. Although it feels nice and snug, if you shwang the slider bearing back and forth you can feel a little play in the upper arm. I will fabricate new arms, but will use these for now for fitting and general assembly.
The pilot uses foot pedals to control the amount and direction of force exerted by the tail rotor to counter to the engine torque and thus control the direction the helicopter is pointing. Whenever the amount of power extracted from the engine is changed (climbing or descending), the amount of force needed from the tail rotor must be adjusted by the pilot to keep the helicopter pointing straight ahead.
The Helicycle kit comes with a largely assembled tail rotor since it is a very critical component and must be precisely constructed and balanced. My tasks consist of mounting, aligning and fabricating the control components.
Start by fabricating the control arms from 1/8” aluminum. Cut out according to the drawing, drill appropriate holes and open up a slot for the slider studs to ride in. I don’t know why, but I did this the hard way by drilling starter holes and opening up the slot with a file. As soon as I started I kicked myself for not setting up the mill and machining out the slot.
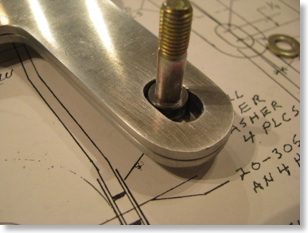
Doing it by hand is definitely not as precise. At one point in the slide there is a tiny bit of slop in the slot between the sleeved bolt and the aluminum. Probably 0.005” - Just enough to “tick” back and forth. I haven’t decided if this is enough to make me go back and fabricate new parts. I think I will see how much play there is when the whole thing is assembled. There are multiple bends and the slop may be “eaten” up by tolerances elsewhere. If there is any play when the tail rotor is installed I will re-fab the parts as I am guessing the tail rotor must be completely slop-free as it is subject to high frequency vibrations and much stress.
Bent and assembled the control arm scissors. Although it feels nice and snug, if you shwang the slider bearing back and forth you can feel a little play in the upper arm. I will fabricate new arms, but will use these for now for fitting and general assembly.